
Effective management of your Business Profile is crucial for ensuring that your CRM environment operates smoothly and aligns with your business requirements. By understanding and utilizing these settings, you can tailor your CRM experience to better fit your operational needs and enhance overall functionality.
By default, the Business Profile is the initial page displayed upon accessing the Settings section. Therefore, after clicking the Settings button from your account Dashboard, you will be directed to the Business Profile.
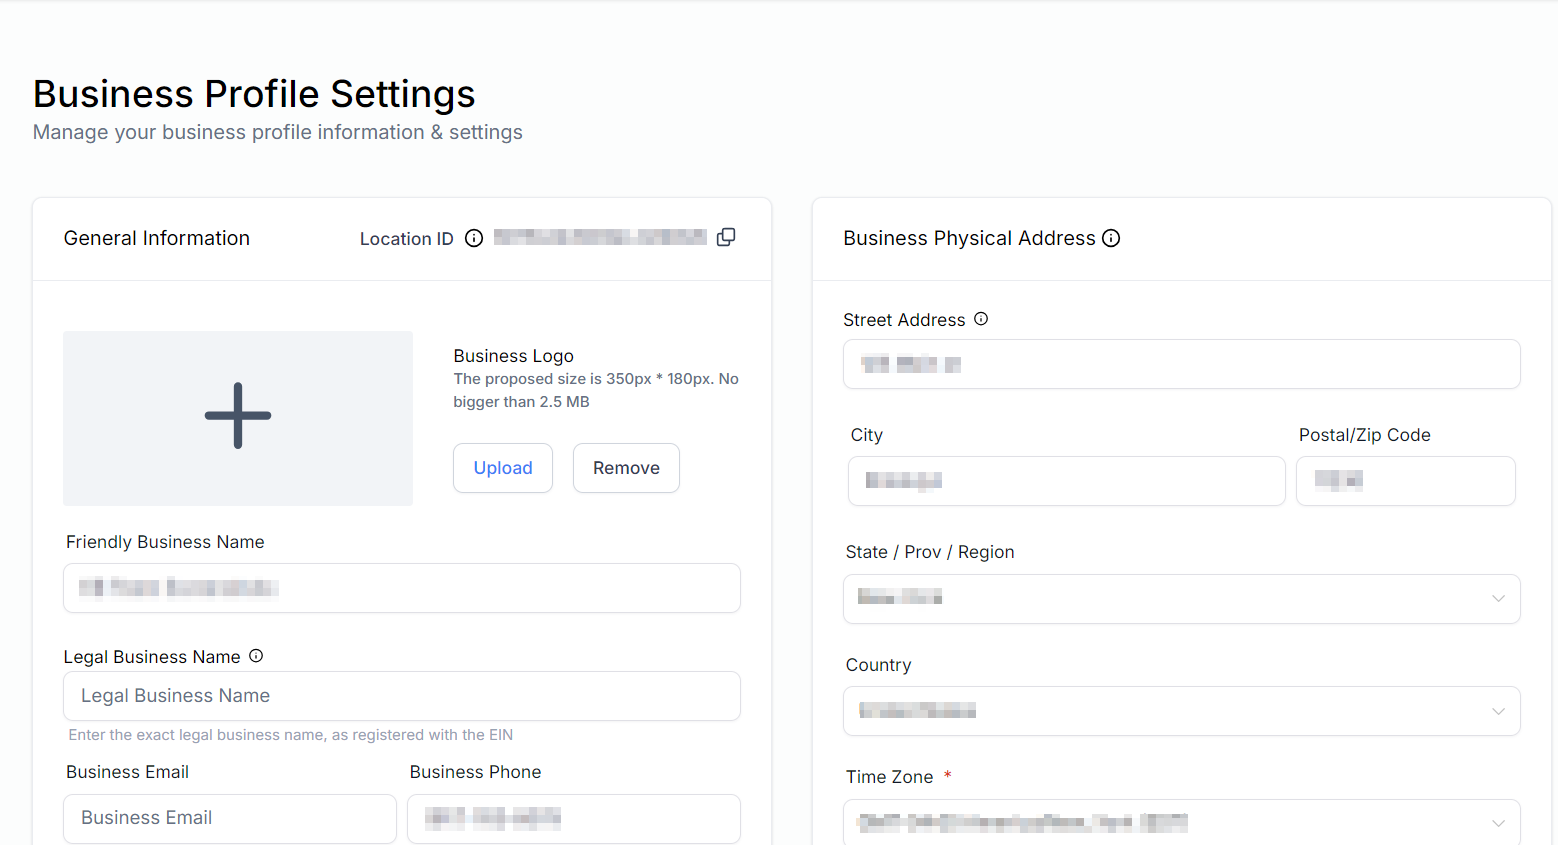
General Information
Providing accurate information and configuring settings within this section will ensure that any Custom Fields or Trigger Links associated with this sub-account correctly reflect your business's details.
- Location ID: This shows the account ID of your company. You can copy the ID by clicking the icon beside the ID.
- Business Logo: Update, change, or remove company logo in this section. The recommended dimensions are 350px by 180px, with a maximum file size of 2.5 MB.
- Friendly Business Name: This name will be utilized for your account when referencing the Custom Field "Account -> Name" in messaging, workflows, and various other areas.
- Legal Business Name: The legal business name entered here will be used for future compliance registrations. Ensure that this name exactly matches the one displayed on legal business documents, such as your business license and registration paperwork.
- Business Email: Enter the email address you wish to use for your account. This email will be utilized when applying the Custom Field "Account -> Email" in messages, emails, workflows, and other sections that support Custom Fields.
- Business Phone: Enter the phone number you wish to use for your account. This number will be utilized when applying the Custom Field "Account -> Phone" in messages, emails, workflows, and other sections that support Custom Fields.
- Branded Domain: Create a "branded domain" by connecting it to a sub-domain through your hosting provider. This branded domain will serve as the URL for various elements such as "Trigger Links," "Calendars," "Forms," "Surveys," and more.
- Business Website: Enter the website URL you wish to use for your account. This URL will be utilized when applying the Custom Field "Account -> Website" in messages, emails, workflows, and other sections that support Custom Fields.
- Business Niche: Assign a business niche to your account by selecting the most appropriate option from the dropdown menu. If your business targets multiple niches, choose the one that best represents your primary target market.
- API Key: The API Key can be used to connect with Zapier and other applications that require an API key for exchanging information. You can copy the API Key by clicking on the "copy" icon and you can also regenerate a new API key by clicking on the "Refresh" icon beside the "copy" icon.
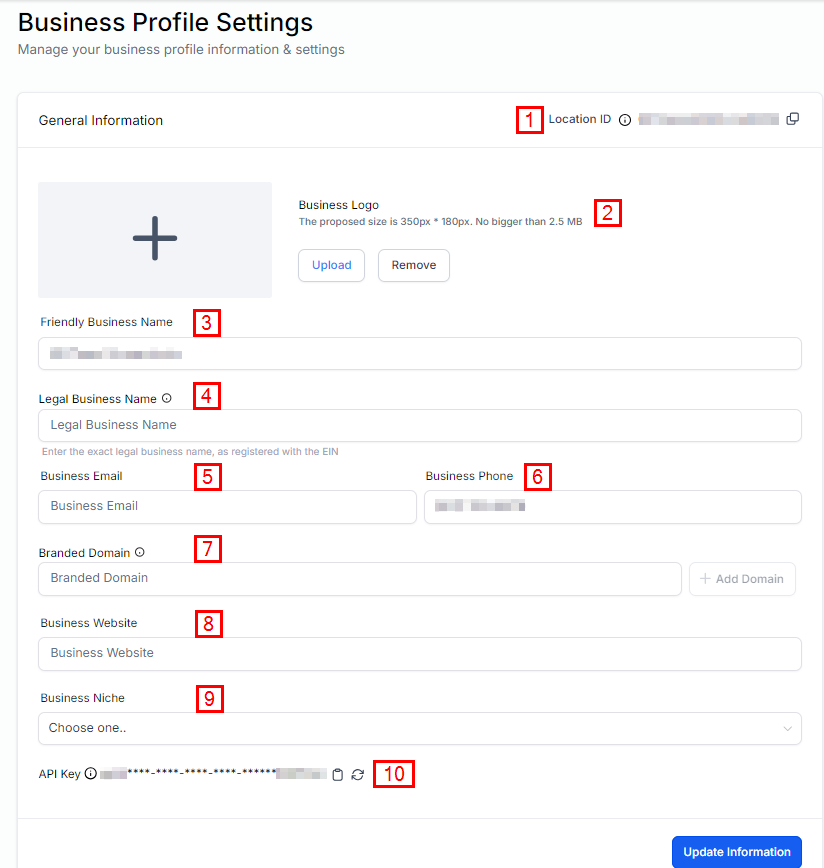
After completing your updates to the General Information, be sure to save your changes by clicking the Update Information button!
Business Physical Address
This information is essential not only for verifying your business for certain features requiring validation but also for incorporating Custom Fields and Custom Values into messages, social posts, email campaigns, websites, and funnels.
- Street Address: Enter the precise street address as recorded in your business registration.
- City: Input the city corresponding to the street address.
- Postal / Zip Code: Provide the postal or zip code linked to your business location.
- State / Prov / Region: Specify the state, province, or region for your business.
- Country: Select the country where your business is registered.
- Time Zone: Select your preferred time zone from the dropdown menu. Automated events within campaigns utilize this field to determine the appropriate timing for sending. Depending on the feature being used, such as workflows or email campaigns, you may have the option to override this default time zone setting.
- Platform Language: Select the language in which your account is displayed from the dropdown menu.
- Outbound Communication Language for Custom Values: Choosing the appropriate language here ensures that all Custom Fields and Custom Values are displayed correctly in the selected language when used in messages, websites, funnels, or any other areas within the platform.
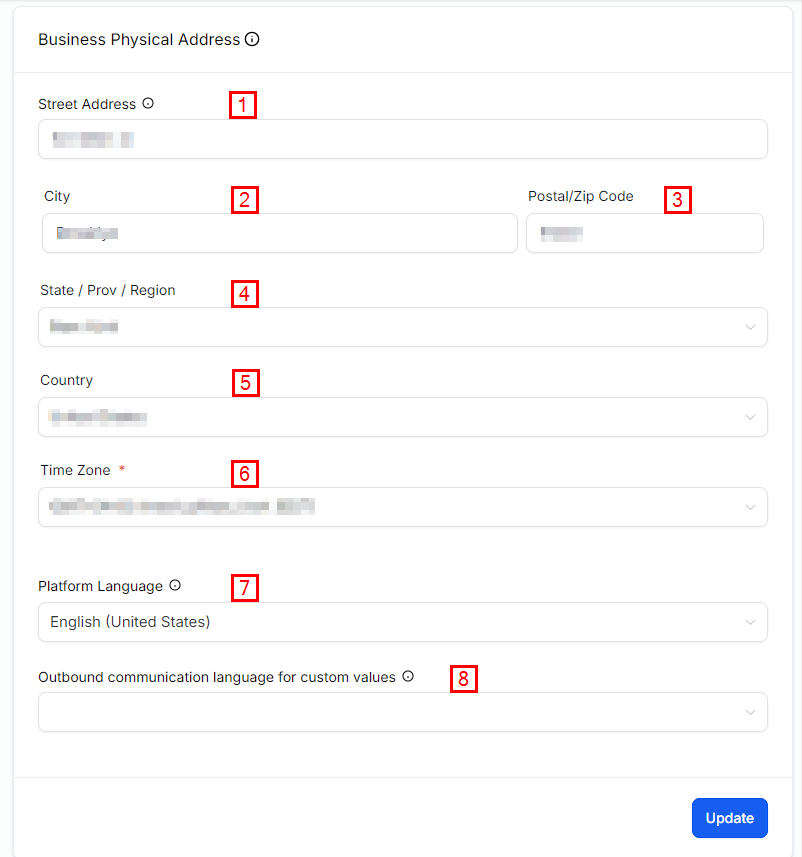
After completing this section, be sure to save your changes by clicking the Update button!
Business Information
This information, including your registration type and number (such as EIN, CCN, VAT) and your regions of operation, is crucial. Properly documenting and registering your business can significantly impact your approval status when applying to send SMS messages.
- Business Type: Select the type of business entity you have established from the available options in the drop-down menu. You can choose from a Co-operative, Corporation, Limited Liability Company (LLC), Sole Proprietorship, Non-profit Corporation, or Partnership, depending on your business structure.
- Business Industry: Select the industry category your company primarily serves.
- Business Registration ID Type: Choose the type of identification you received for your business registration.
- Business Registration Number: Enter your company's Registration number here. If your business is not yet registered, tick the My business is Not registered box instead.
- Business Regions of Operation: Select the region in which your company is located. You can select more than one option if your company has branches in multiple locations.
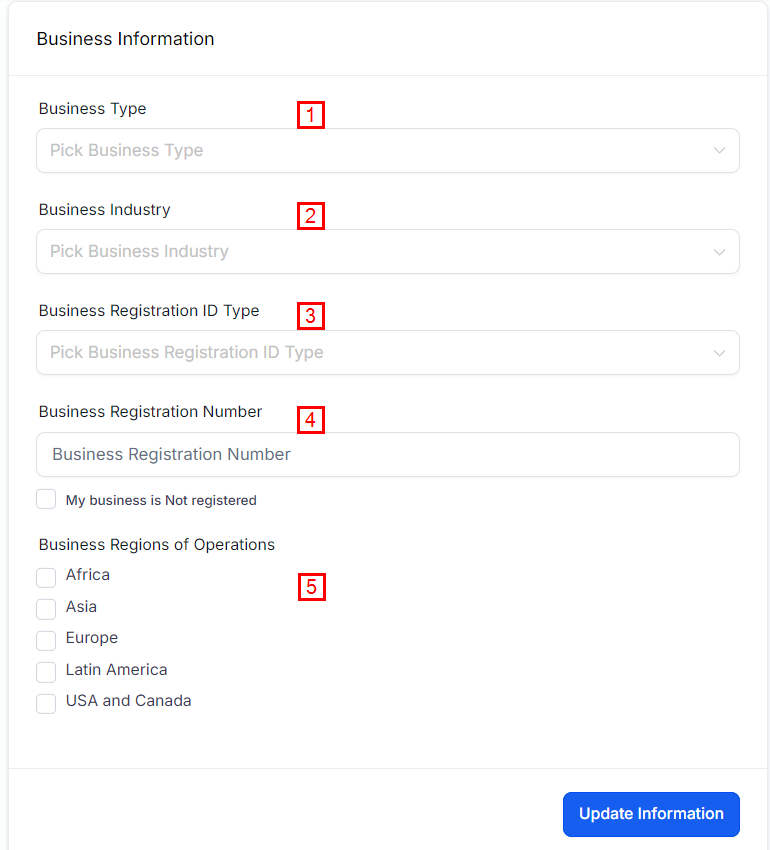
After completing your updates to the Business Information, be sure to save your changes by clicking the Update Information button!
Authorized Representative
To designate an Authorized Representative in your system, input the individual's first and last name, email address, job position within your company, and phone number, including the country code.
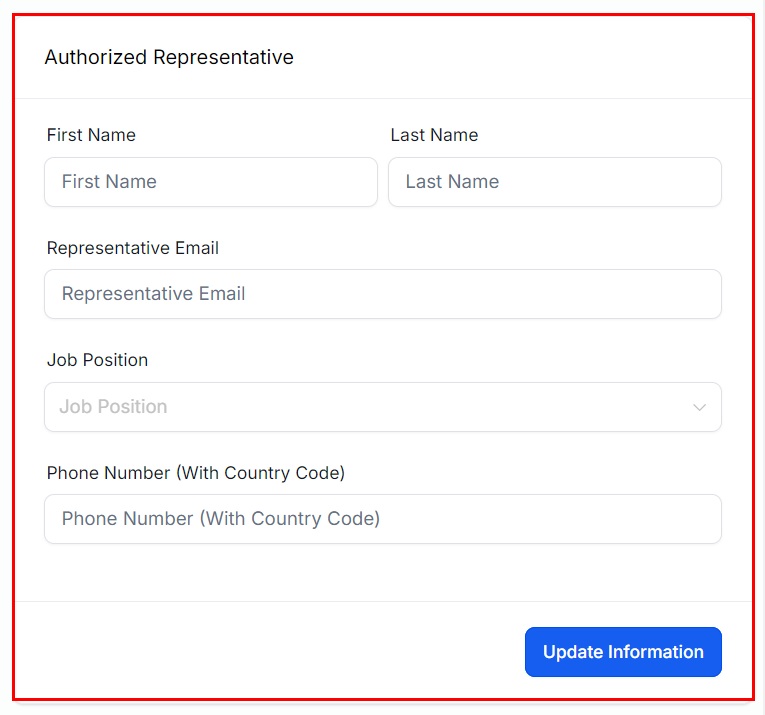
Be sure to click the "Update Information" button to save any changes after confirming the details entered.
General Settings
These settings address compliance requirements and enable enhanced personalization features.
- Allow Duplicate Opportunity: Enabling this feature will permit the creation of duplicate opportunities within the same pipeline. When activated, new opportunities will be generated within the existing pipeline, rather than moving an opportunity from one pipeline stage to another.
- Merge Facebook Contacts By Name: When this option is enabled, incoming messages from Facebook will be merged with existing contacts if the names match exactly. Please note that name matching is case-sensitive.
- Disable Contact Time Zone: If contact time zones are disabled, all appointments and time-based tools will use the time zone selected in the Business Physical Address section.
- Bot Detection Preventing Statistics Increment and Automation Execution: This feature prevents bots from inflating email engagement metrics and triggering automation by blocking the increment of open/click counters and stopping any automation events caused by bot interactions.
- Mark Emails as Invalid due to Hard Bounce: If enabled, a contact's email will automatically be marked as invalid when a hard bounce occurs, and any email-related actions in automation will be bypassed for contacts with invalid emails.
- Gather Intelligence on Unknown Phone Numbers: This feature automatically validates a contact's phone number when sending the first SMS message to a new number in your account when enabled. It also detects incoming spam calls, and looks up the names of unknown callers before answering the phone.
- Verify Email Address when first email is sent to a new contact: This feature attempts to verify an email address when sending the first email to a contact. If the email address is marked as "Invalid," the email will not be sent, and you will need to verify the email address before you can send future emails to that contact.
- Make Email compliant by adding an Unsubscribe link in your email: This feature enables recipients to opt out of receiving emails related to your products or services. If you choose to disable this option, ensure an unsubscribe link is included in all system-generated emails. You can customize your default unsubscribe link by clicking the "Customize" button.

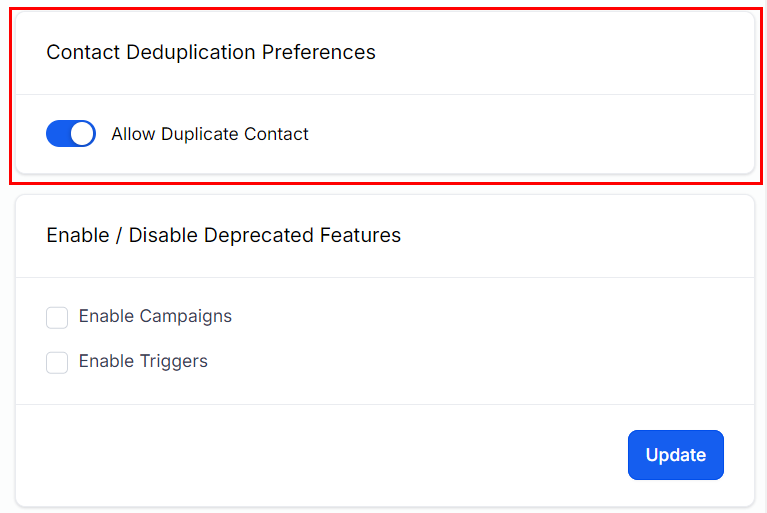
Contact Deduplication Preferences
This setting controls how your account handles duplicate contacts. To allow duplicate contacts, toggle this setting to the on position. To disallow duplicate contacts, toggle it to the off position.
When the setting is toggled off, you will have the option to customize how duplicates are identified. You can prioritize email addresses or phone numbers as the primary criterion and, if desired, add a secondary factor for further confirmation.
Deprecated Features
Enable or disable features that have been phased out within this section. Currently, the features available in this list are Campaigns and Triggers since they have been replaced by Workflows.
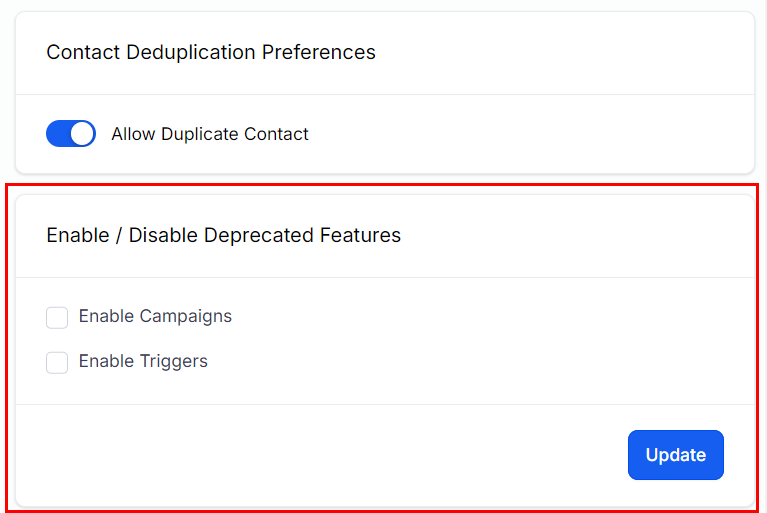
Click the Update button after enabling or disabling any of these features!
And there you have it—your ultimate guide to mastering the Business Profile! With your Business Profile now finely tuned, you’re all set to give your CRM system a personal touch that will keep things running smoothly and in sync with your business goals.