
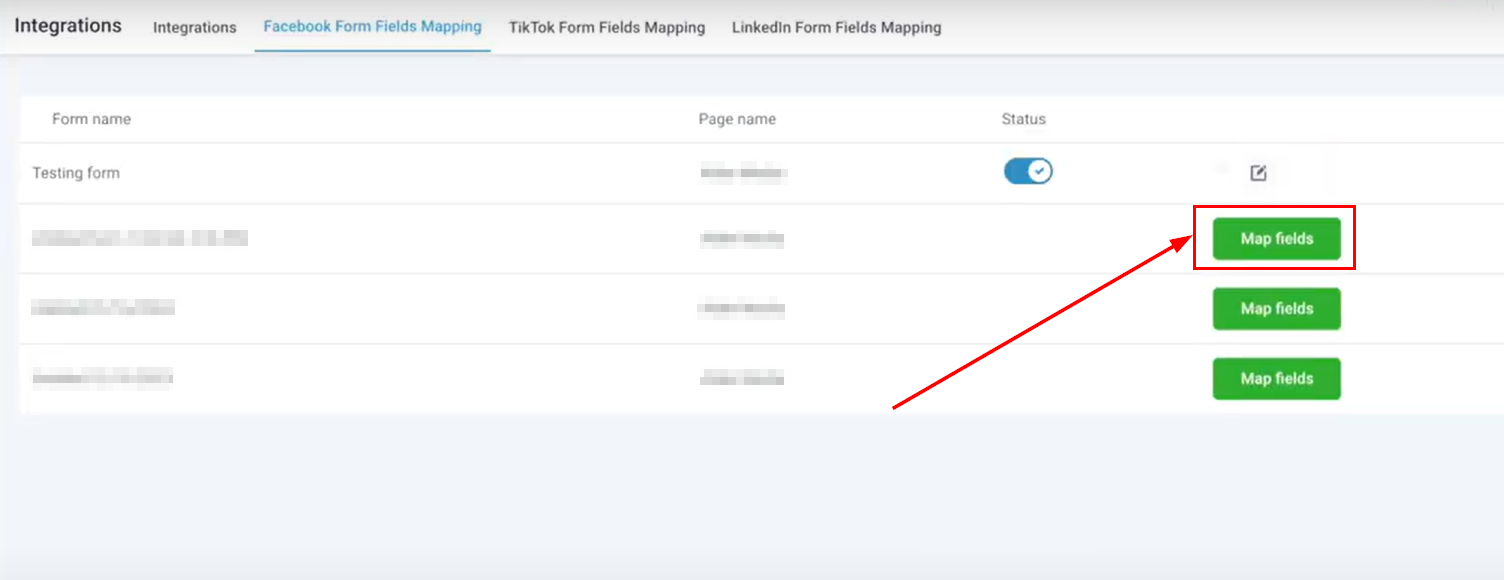
Forms that have successfully had their fields mapped will display a status toggle. This toggle indicates the current status of the mapping and allows you to make modifications if necessary. To edit the mapped fields, click the edit icon associated with the form.
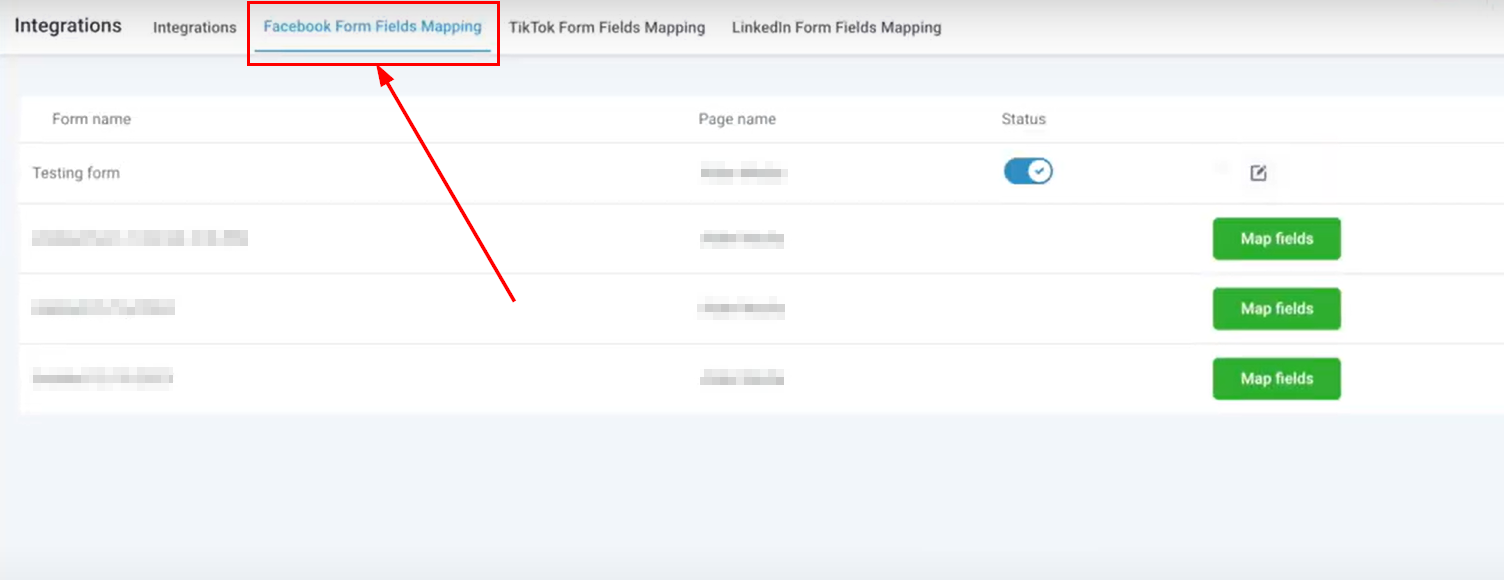
If a form’s fields have not been mapped, you will be prompted to complete the mapping process.
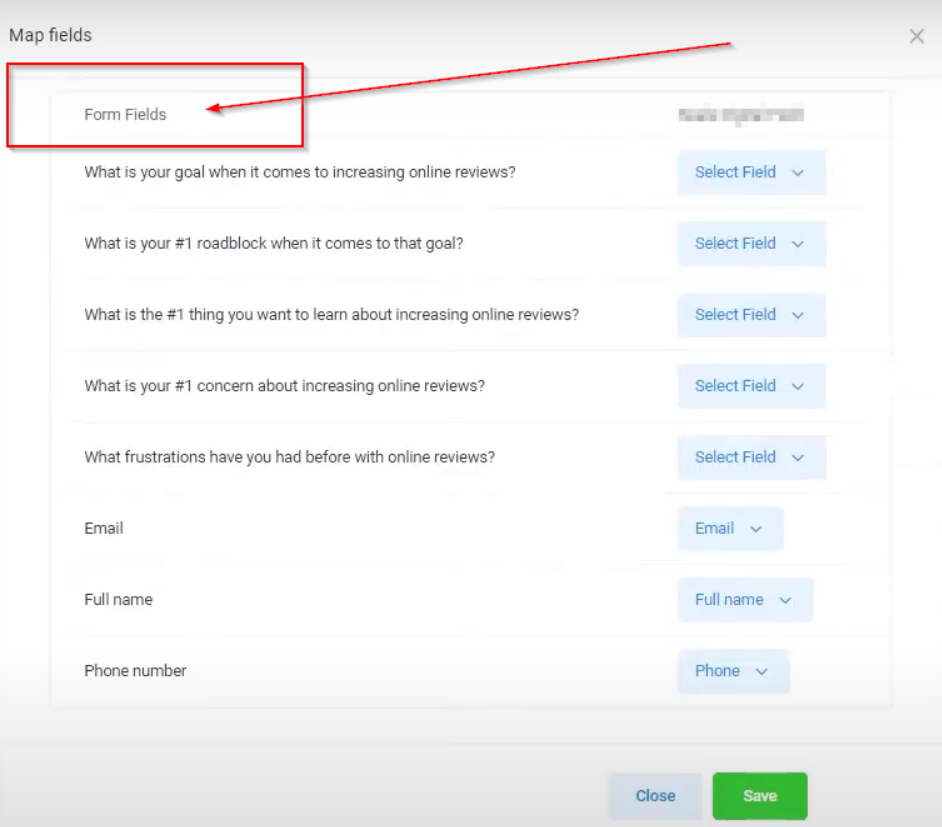
By displaying the fields from your Facebook form, you can view and manage the various data input elements. This feature allows for a clear overview of the fields that need to be mapped.
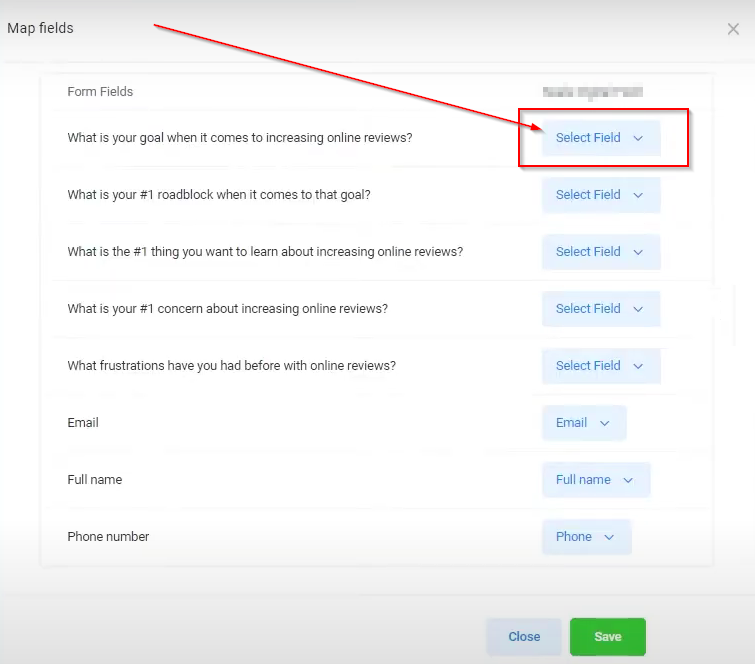
By clicking the “Select Field” dropdown, you will see the fields you have created that can be mapped to the corresponding fields in your Facebook form. Properly aligning these fields ensures a seamless transfer of data between the two platforms.
After mapping the fields and making any necessary adjustments, it is essential to save your settings. This action ensures that all configurations are correctly applied and that the integration functions as intended.
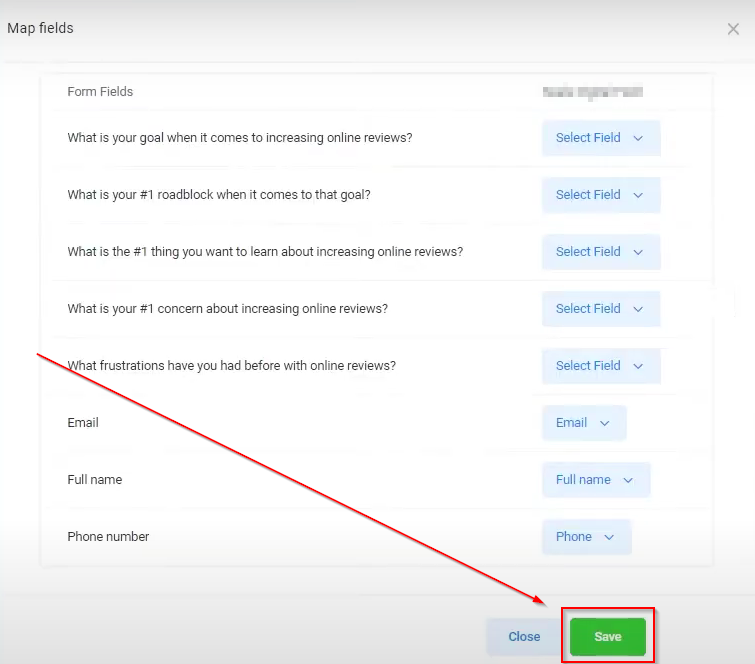
Accurately mapping Facebook form fields to your CRM is crucial for ensuring smooth and effective data integration. This guide provides a detailed overview of how to display, select, and map the appropriate fields from your Facebook forms to your CRM, ensuring that your data is seamlessly transferred and managed. By following these steps, you will enhance the efficiency of your data integration and improve the overall functionality of your CRM system.
Troubleshooting Tips
Why are my Lead Ads not making it into my account?
- Ensure you are an admin of the Facebook page and that the correct Lead Ad form is selected in Facebook Ads Manager. Verify the form's mapping in your account settings.
How can I fix missing leads or errors in lead synchronization?
- Check business and ad account settings to ensure correct permissions and connections. Verify that the Page Owner matches the Ad Account Owner and that lead access permissions are correctly assigned.
What steps should I take if a Page is missing or access is denied during integration?
- Ensure that the Page Admin has the necessary permissions and try adding a second admin if needed. Follow the steps to grant the required access and verify integration settings.