
A big part of running a business is collecting payments, and two common ways to do so are by sending invoices and providing estimates. Invoices help you collect payments from clients after a sale or service, while estimates give clients an idea of the expected costs before committing. You might be used to the standard approach for creating invoices and estimates: adding the client’s and item’s information and sending them out.
However, your CRM has features that make both the invoicing and estimation process easier for you and your customers. Let’s walk through how to set these up.
Accessing Invoice & Estimate Settings
Go to the Invoices & Estimates tab in the Payments section. Inside, click the Settings button to access various configurations.

Once inside the Invoice & Estimate Settings, you’ll find several options that allow you to modify how your invoices and estimates function:

Estimate Expiry Days
You can set the number of days before an estimate expires by adjusting the Estimate Expiry Days.

Estimate Prefix
Additionally, use the Estimate Prefix to assign a unique prefix to help you distinguish different estimates in your system.

Invoice Due Date
This will fill the due date in the created invoices by default, if you have a standard or legally required timeframe for your invoices you can avoid the hassle of setting up each time by doing so here. And, even though the due date can be changed directly in the invoice as needed the changes will only apply to that invoice.

Manage Default Stripe Payment Methods
You can configure bank-only transfers as a payment option for invoices, which makes it easier to offer preferred methods to clients.

Customers can pay via a Valid payment method or through SEPA and ACH Bank transfers. Currently, this feature supports Stripe for ACH (Automated Clearing House) and SEPA (Single Euro Payments Area) transfers. When enabled, customers will only see the bank transfer option during payment.

📌NOTE: This payment method is not available for invoices in currencies unsupported by these payment methods.
Partial Payments
Partial Payments allow your customers to pay for portions of an invoice instead of limiting them to a whole payment while ensuring that you still have some control over how much. With this, you don't have to worry about receiving microtransactions enhancing client payment capture rates.


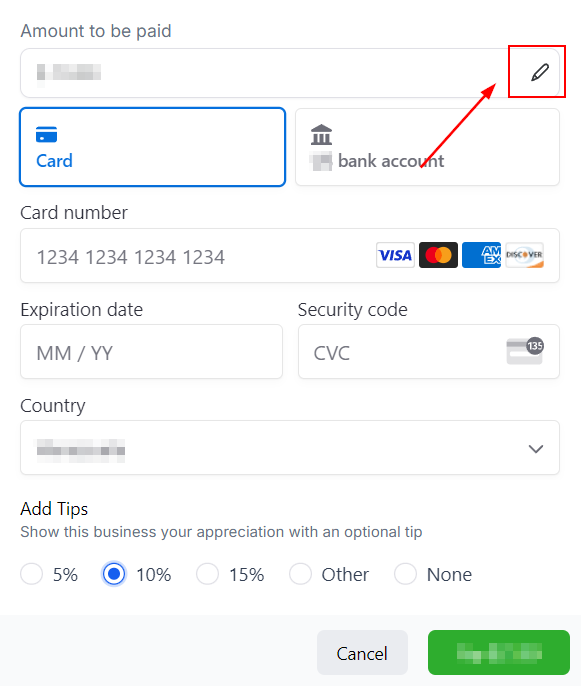
Client View
When the invoice is sent, the clients will see a pencil icon next to the amount. Upon clicking it, they can edit the Amount to be paid.
📌NOTE: For recurring invoices, partial payment will only be available on invoices with auto payment disabled or the first payment of invoices with auto payment enabled.
Charge Late Fees
This option allows you to charge customers an extra percentage for exceeding the payment due date. To learn how to manage it, please read “How to Set Up Late Fees on Invoices.”

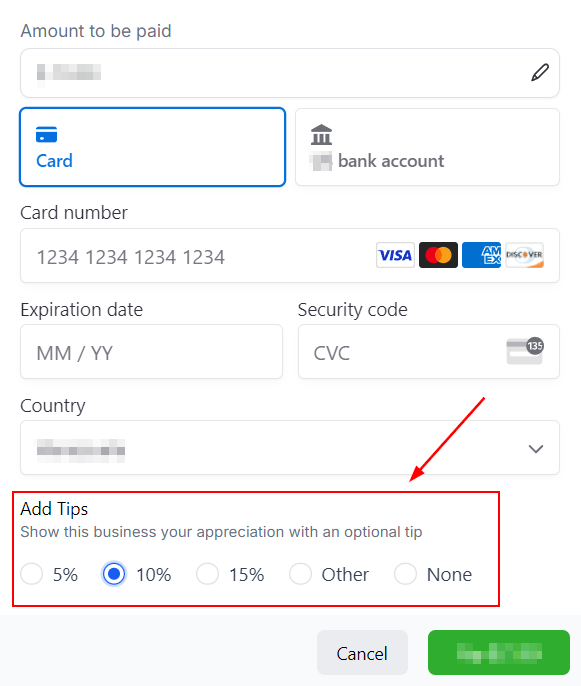
Tip Payments
Enable Tips to allow customers to express appreciation for your services by leaving an optional gratuity. You can set default tip percentage options for them to choose from, or they can enter a custom amount.


Finishing the Setup
Once you're happy with all those settings click the Save button. These settings will apply to all future invoices and estimates you create. If business policies change, you can always come back and adjust them.

Setting up these features saves time and effort, as they apply globally to all your invoices and estimates going forward.
FAQs
Q: Why aren’t my invoices or estimates being sent?
- A: Check that a payment gateway is integrated. Go to the Integrations tab to verify whether your payment gateway is connected. If it isn’t, connect it before continuing.
Q: Do I need to refund the tip separately when refunding an invoice?
- A: No, you can refund the full invoice amount, including any tips.
Q: How do I enable bank transfers only for an invoice?
- A: Open the invoice, click on the three-dot menu, select Manage Payment Methods, and toggle on Bank Transfers Only.
Q: Can I customize payment methods for individual invoices without affecting global settings?
- A: Yes, you can modify payment methods on a per-invoice basis while keeping the global configuration intact.
Q: Why aren’t my invoices or estimates being sent?
- A: Ensure a payment gateway is integrated. Go to the Integrations tab to verify your payment gateway connection.
Q: Do I need to refund the tip separately when refunding an invoice?
- A: No, refunding the invoice will automatically include any associated tips.