
Setting up payment processing is essential for streamlining your service transactions. By configuring the appropriate settings in your service calendar, you can ensure that your appointments are integrated with payment collection. This guide will walk you through the steps to enable payments in your calendar, view upcoming payments on the mobile app, and efficiently record transactions.
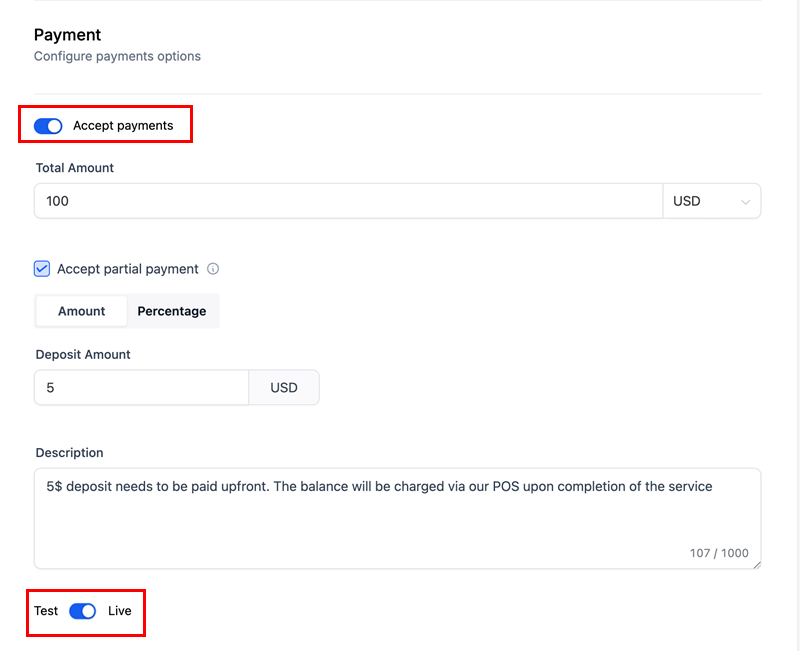
To ensure that payment processing is properly set up, navigate to the Calendar Settings section of the web platform.

In your service calendar, enable the "Accept Payments" toggle located under the Forms and Payments section. Be sure to set the Payment Mode to "Live" before saving your settings!
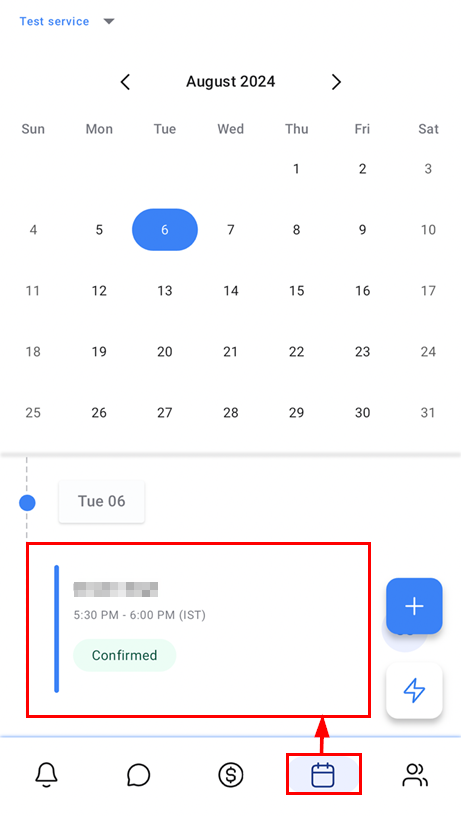
Once configured, the event will appear in the Calendars section of your mobile app every time a customer books an appointment. Open the app, ensuring the correct account is selected, and tap on the event.
You will see the amount due for the service, along with options to "View Invoice" and "Record Payment."
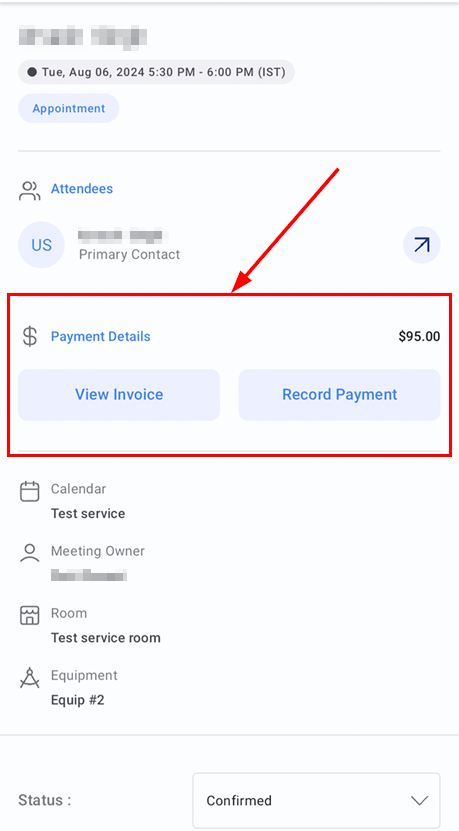
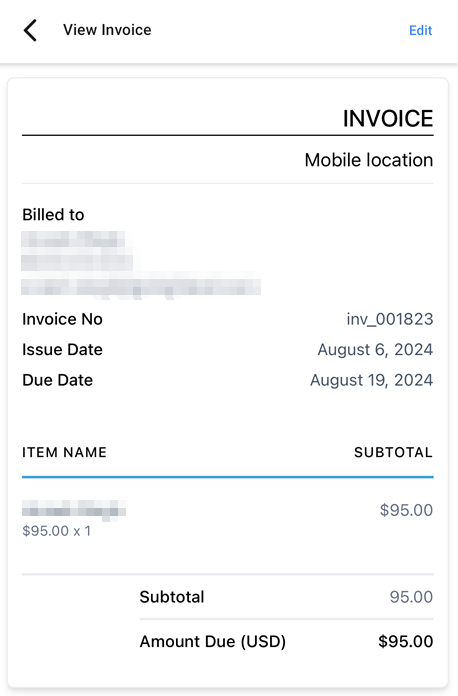
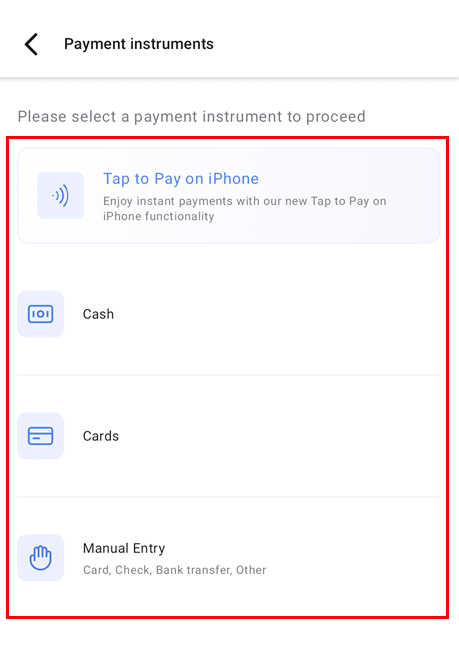
Selecting "View Invoice" allows you to open and edit the invoice, while choosing "Record Payment" will bring up the payment options.
Select "Tap to Pay" or your preferred method to complete the transaction, and you're all set!
By following these steps, you’ve successfully enabled payment processing within your service calendar. This not only simplifies your workflow but also enhances the customer experience by offering convenient payment options directly through the mobile app. Stay on top of your appointments and payments with ease, ensuring your business runs smoothly and efficiently.