
Welcome to your onboarding engine!
Let's explore the Onboarding feature, explicitly focusing on Onboarding Forms, Templates, and Sub-Account Management.
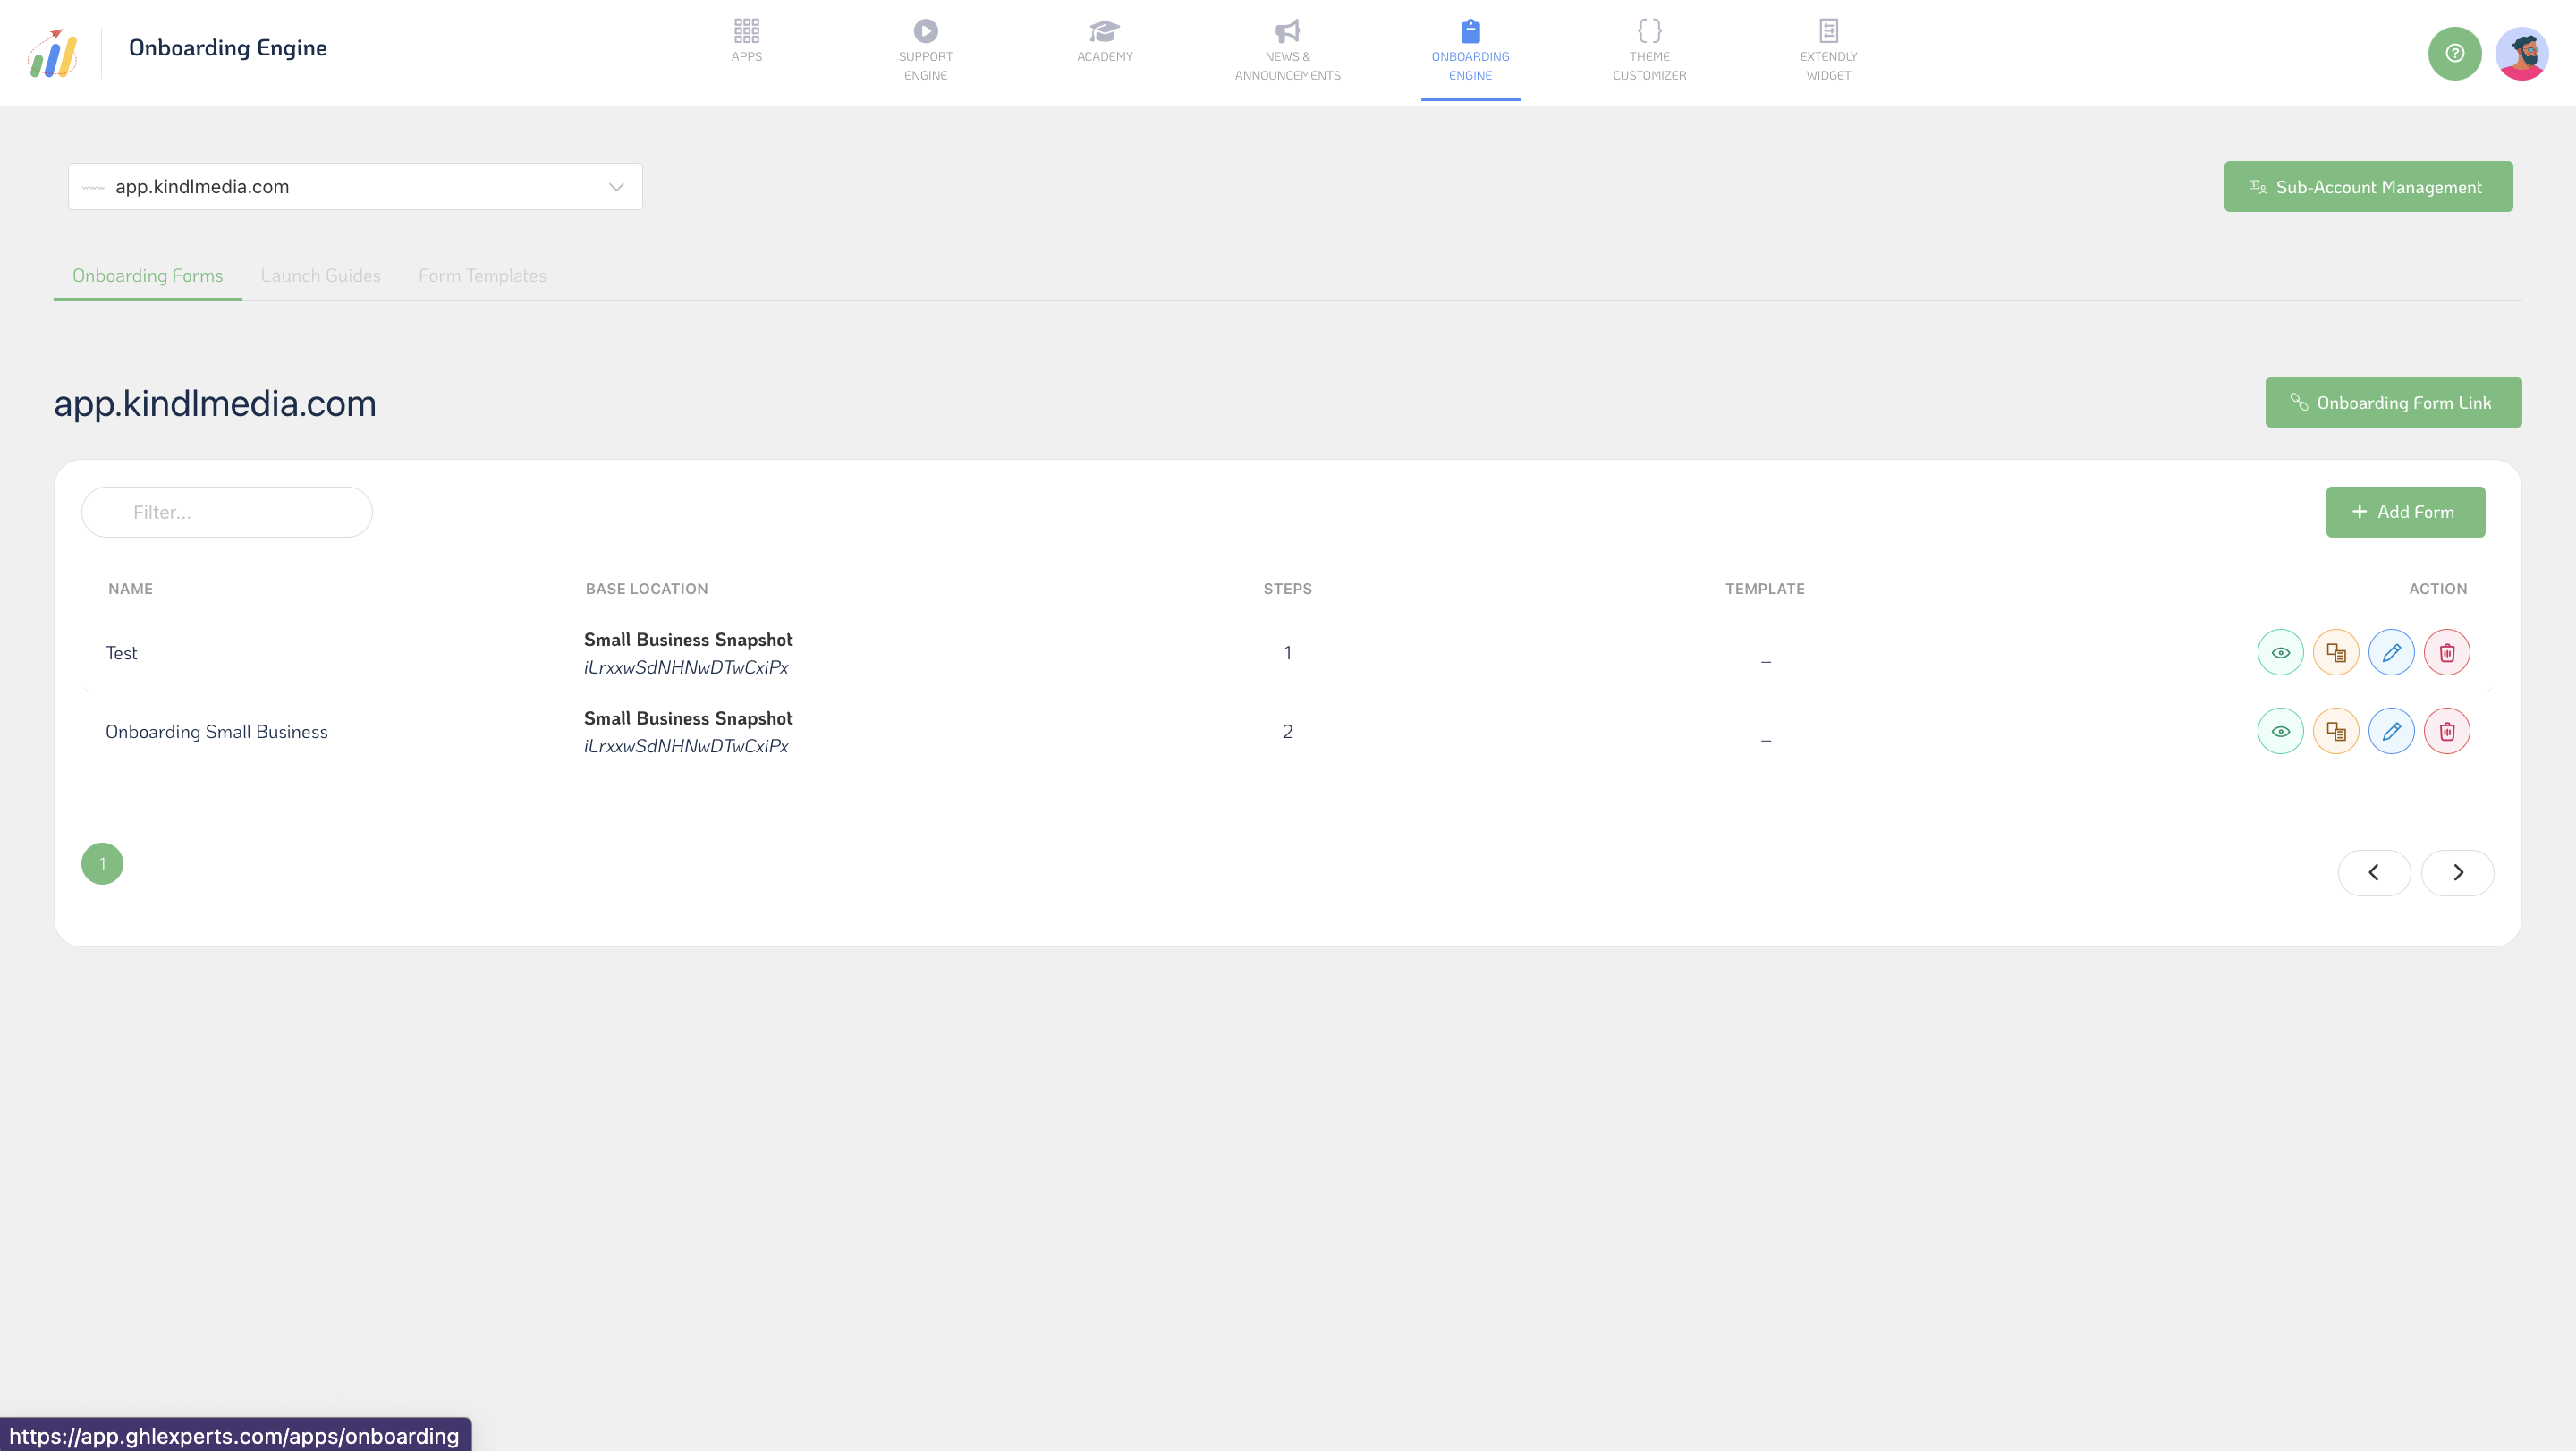
Starting with Onboarding Forms, this feature streamlines gathering necessary information from your users for proper setup. Here's how it works:
- You can create custom Onboarding Forms tailored to your needs, including fields for Name, Base Location, and any additional steps required.
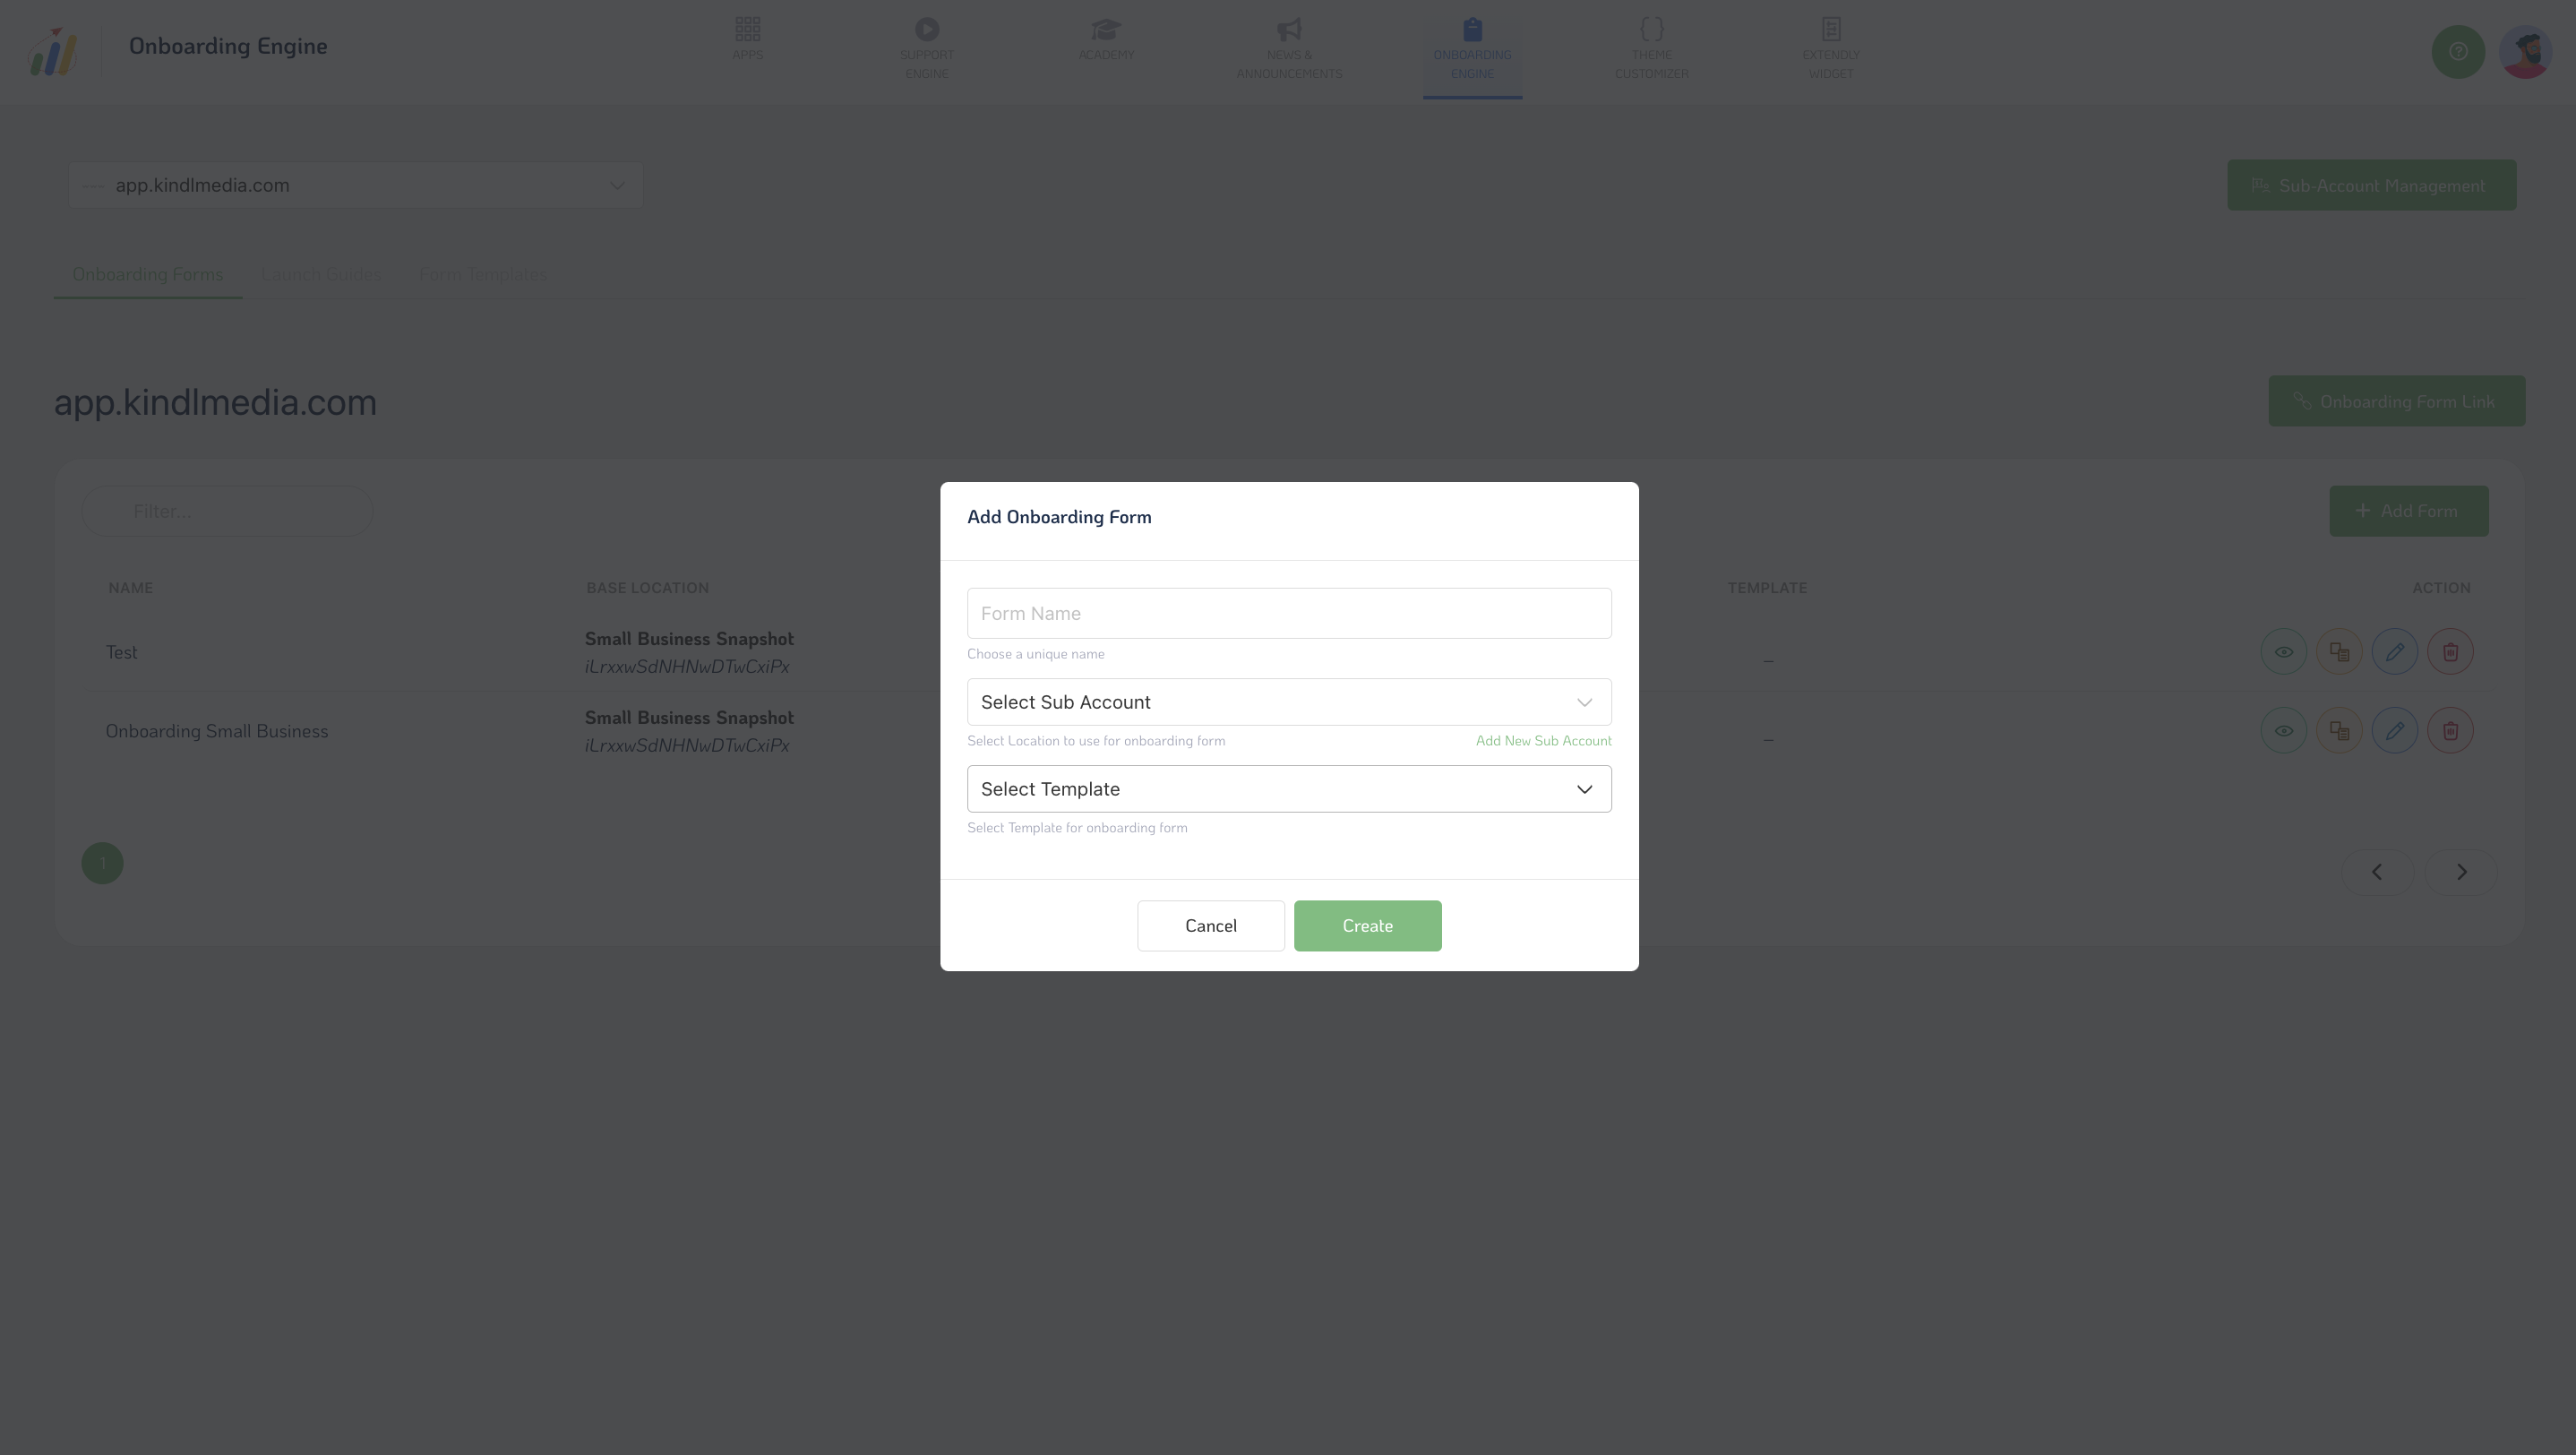
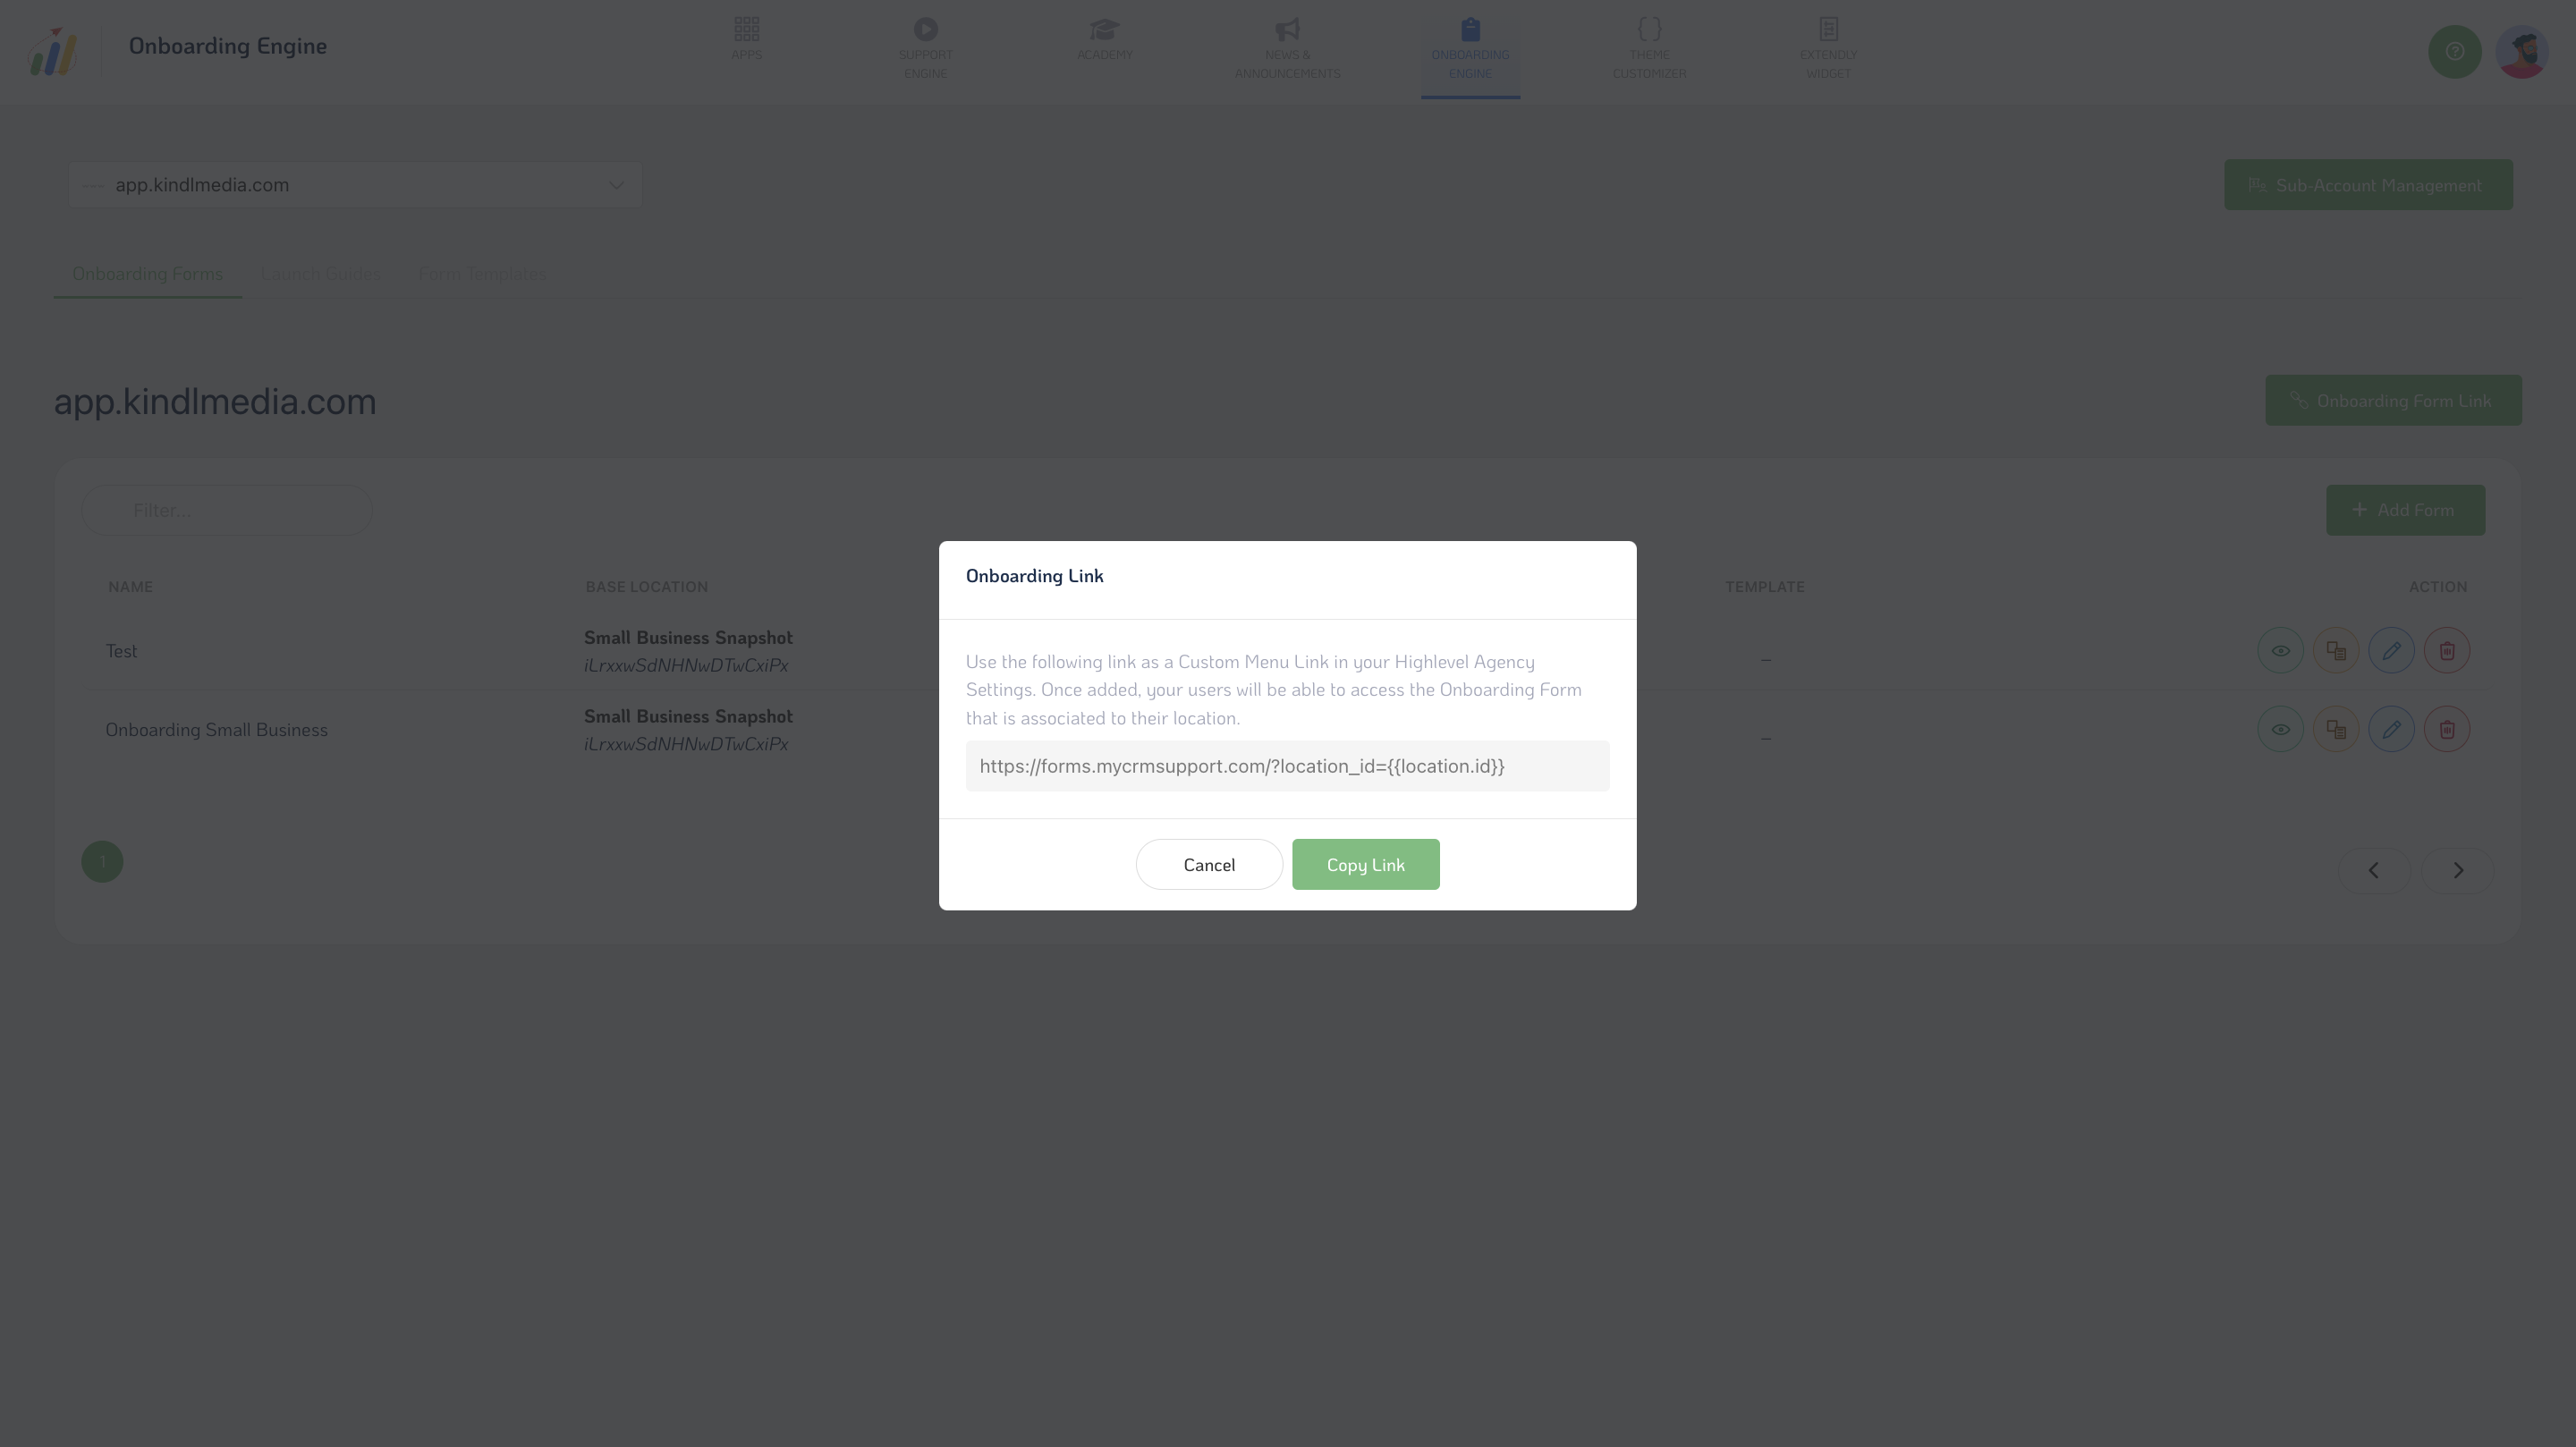
- Once created, Onboarding Forms can be easily accessed and managed. You can add new forms, select sub-accounts for each form, and generate a unique Onboarding Form Link for distribution.
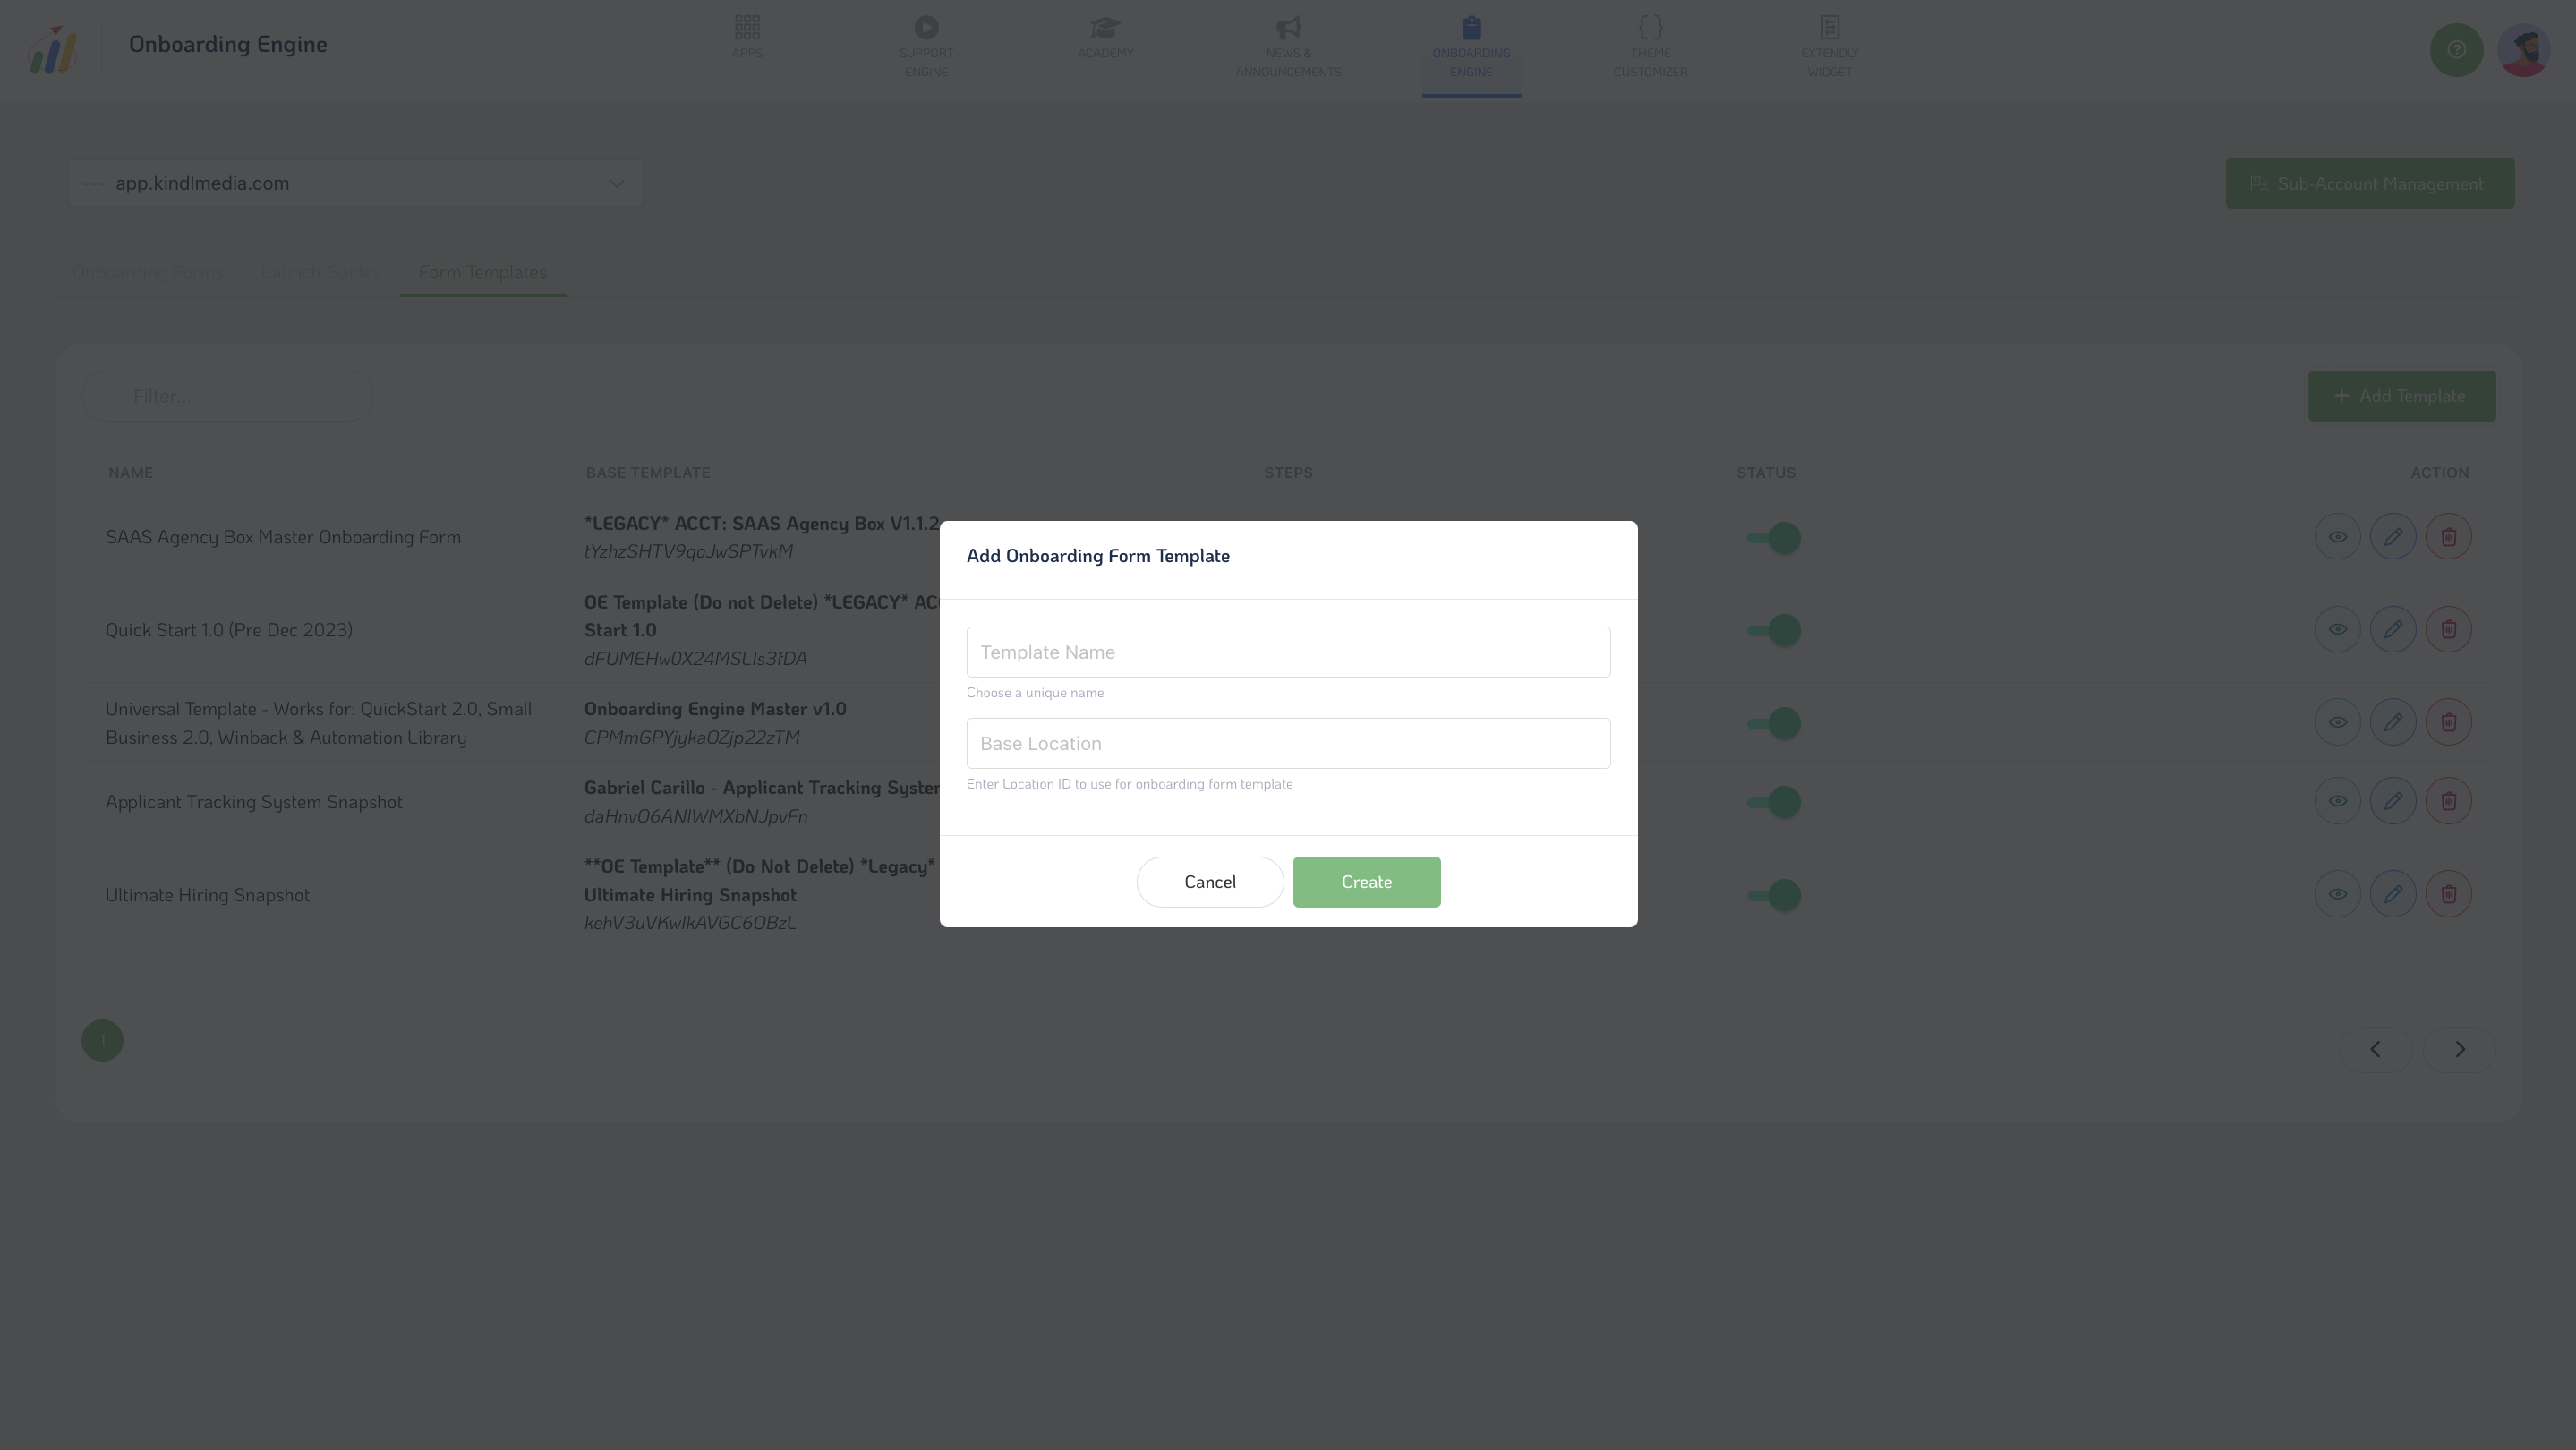
Form Templates provide a convenient way to standardize your onboarding process. You can create templates with predefined steps and reuse them for consistency.
- Name: This field allows you to provide a descriptive name for your template, making it easy to identify and reference.
- Base Template: Selecting a base template provides a foundational structure for your onboarding form, guiding the creation of predefined steps tailored to your specific needs.
- Steps: Within the template, define the sequential steps comprising your onboarding process, outlining the actions and information required at each stage.
- Status: Monitor your template's status, whether it's in progress, completed, or undergoing review, to track its development and implementation.
- Actions: Upon completing the template setup, various actions are available to manage and optimize its usage, including editing, duplicating, or archiving the template as needed.
- Add Template: Initiate the process of adding a new template to the SupportOS, setting the stage for efficient onboarding management and execution.
- Template Name: Enter a distinctive name for your template, reflecting its purpose and guiding the onboarding process it represents.
- Base Location ID: Specify the base location or department associated with the template, ensuring alignment with relevant organizational structures and workflows.
- Create: Once all necessary details are provided, proceed to create the template, which will establish a structured framework for your onboarding process.

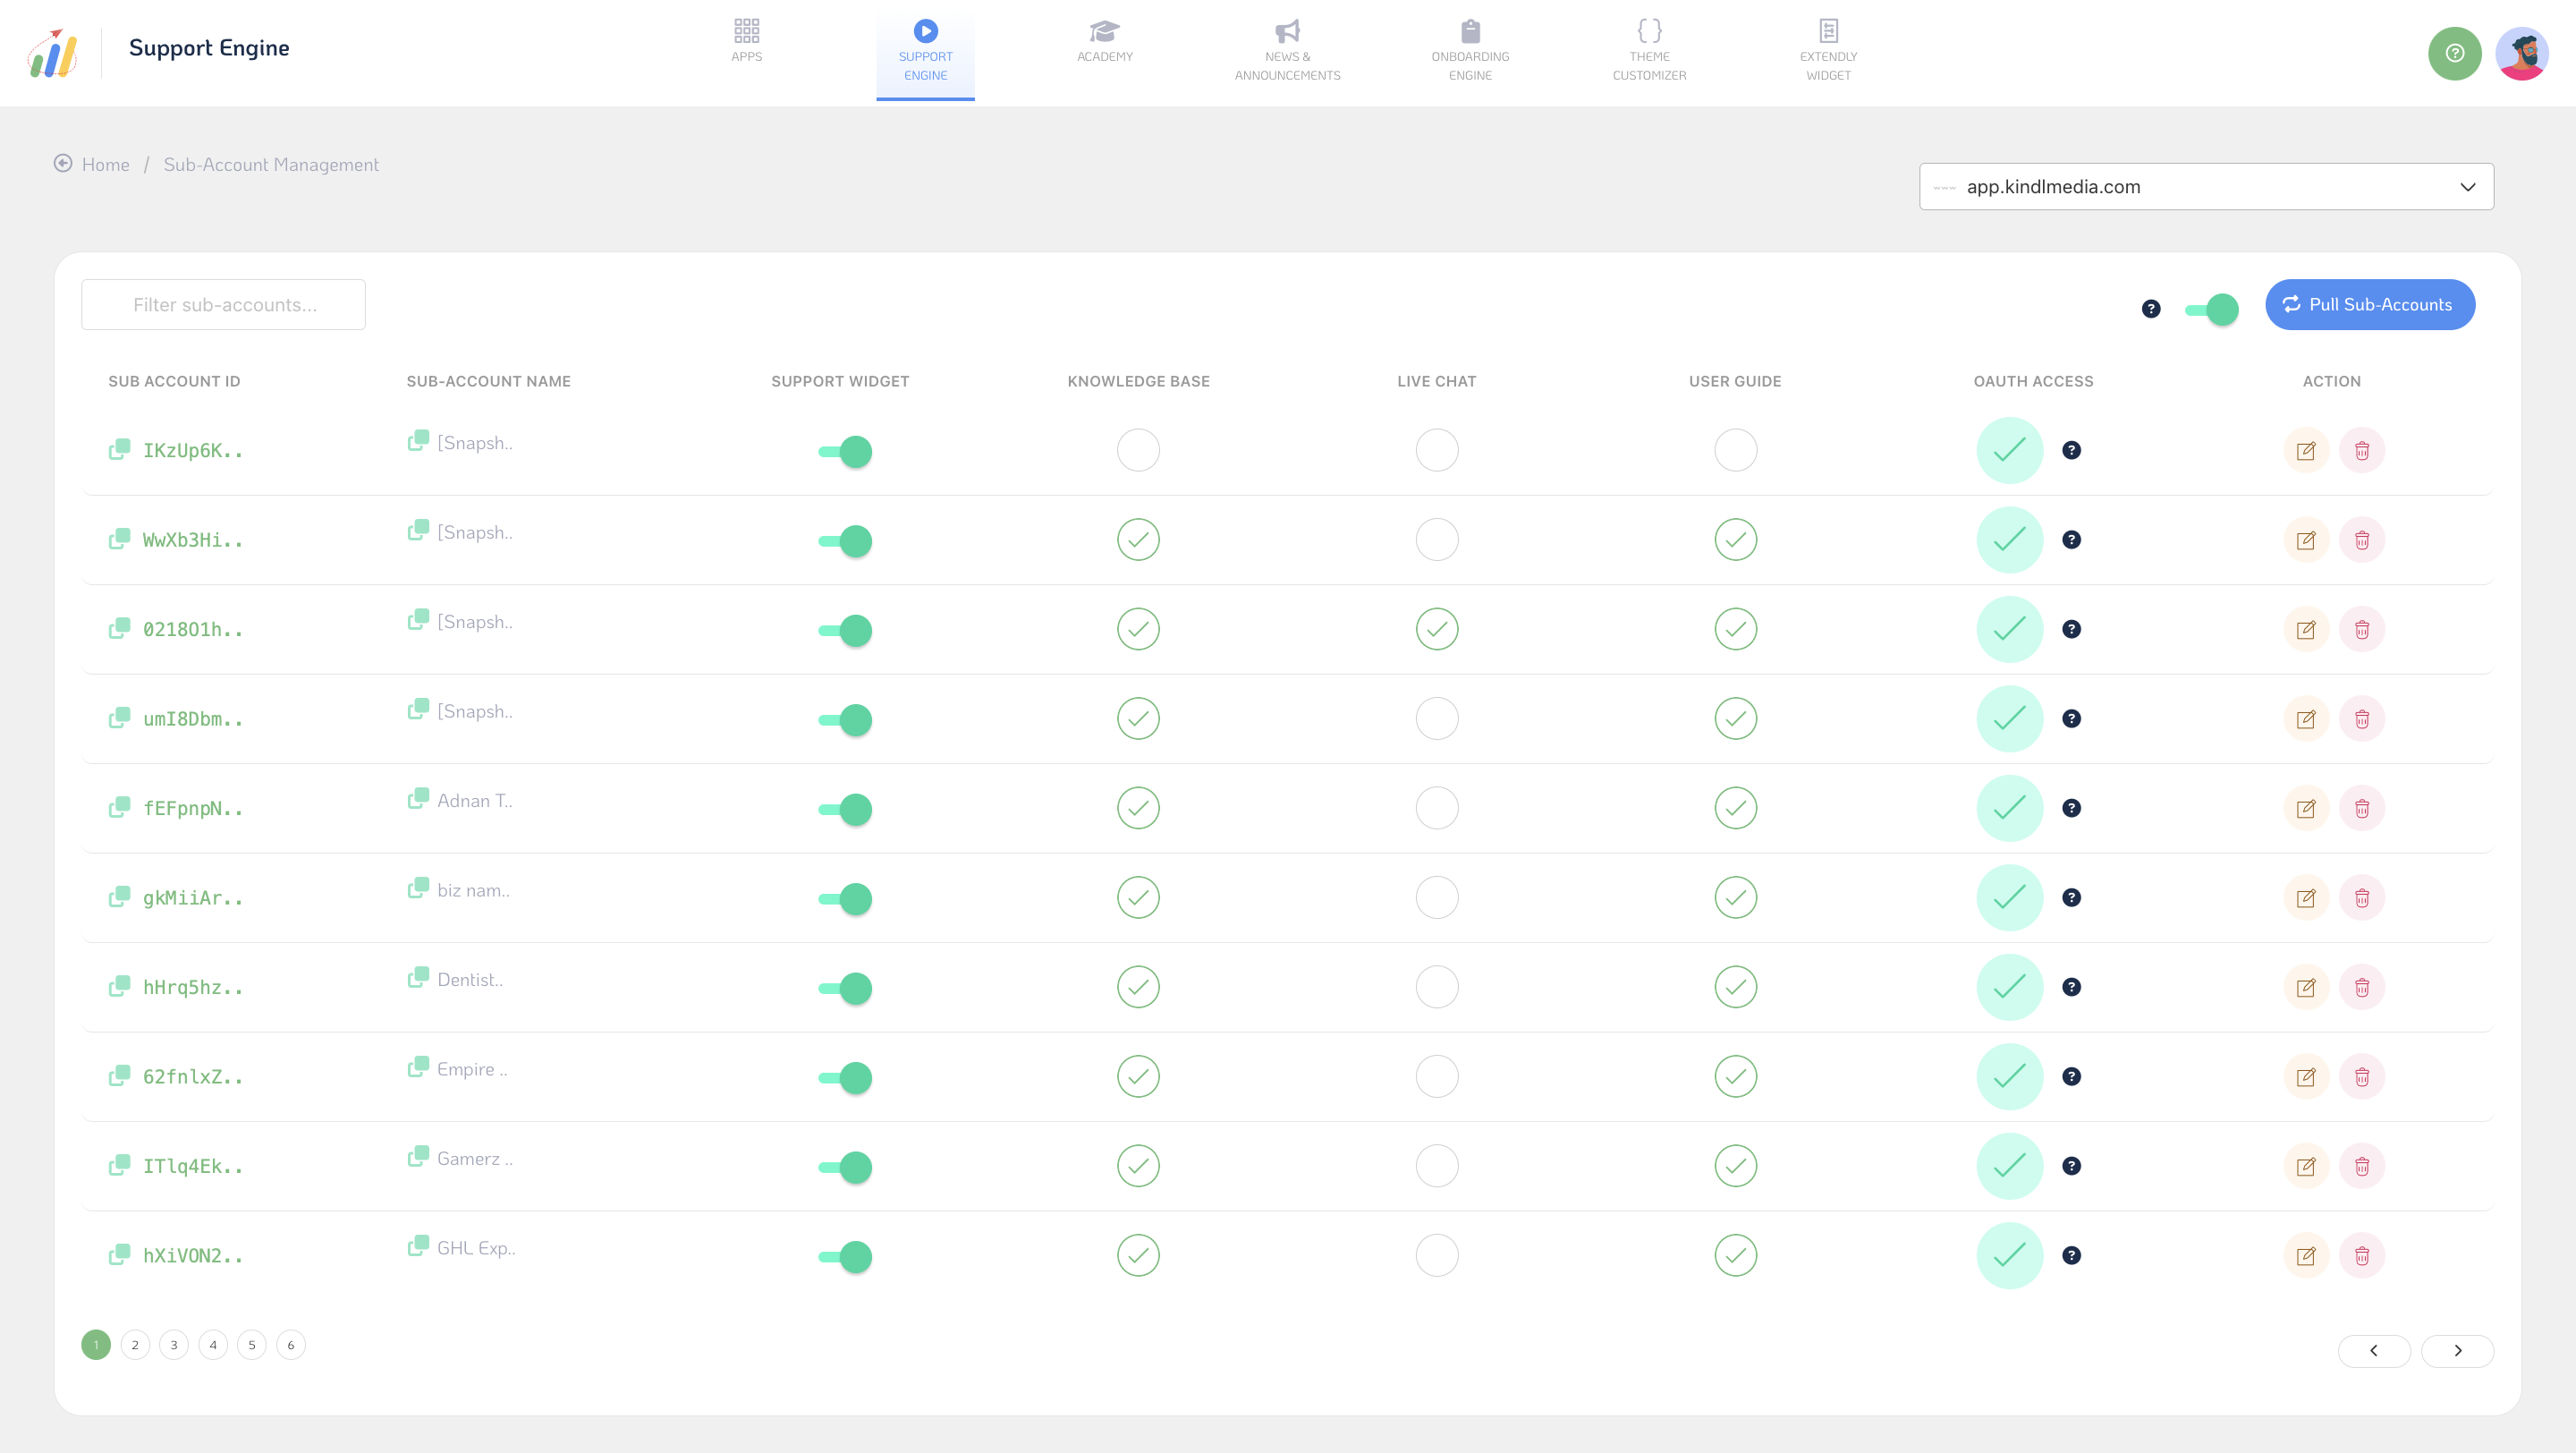
Moving on to Sub-Account Management, this feature gives you granular control over which accounts can access various features within your platform.
- Each higher-level "App/Engine" comes equipped with Sub-Account Management settings.
- You can view and manage Sub-Accounts, including their IDs, names, and access permissions for features like the Support Widget, Knowledge Base, Live Chat, and more.
This level of control ensures that each account only sees the apps they've subscribed to, enhancing security and usability.
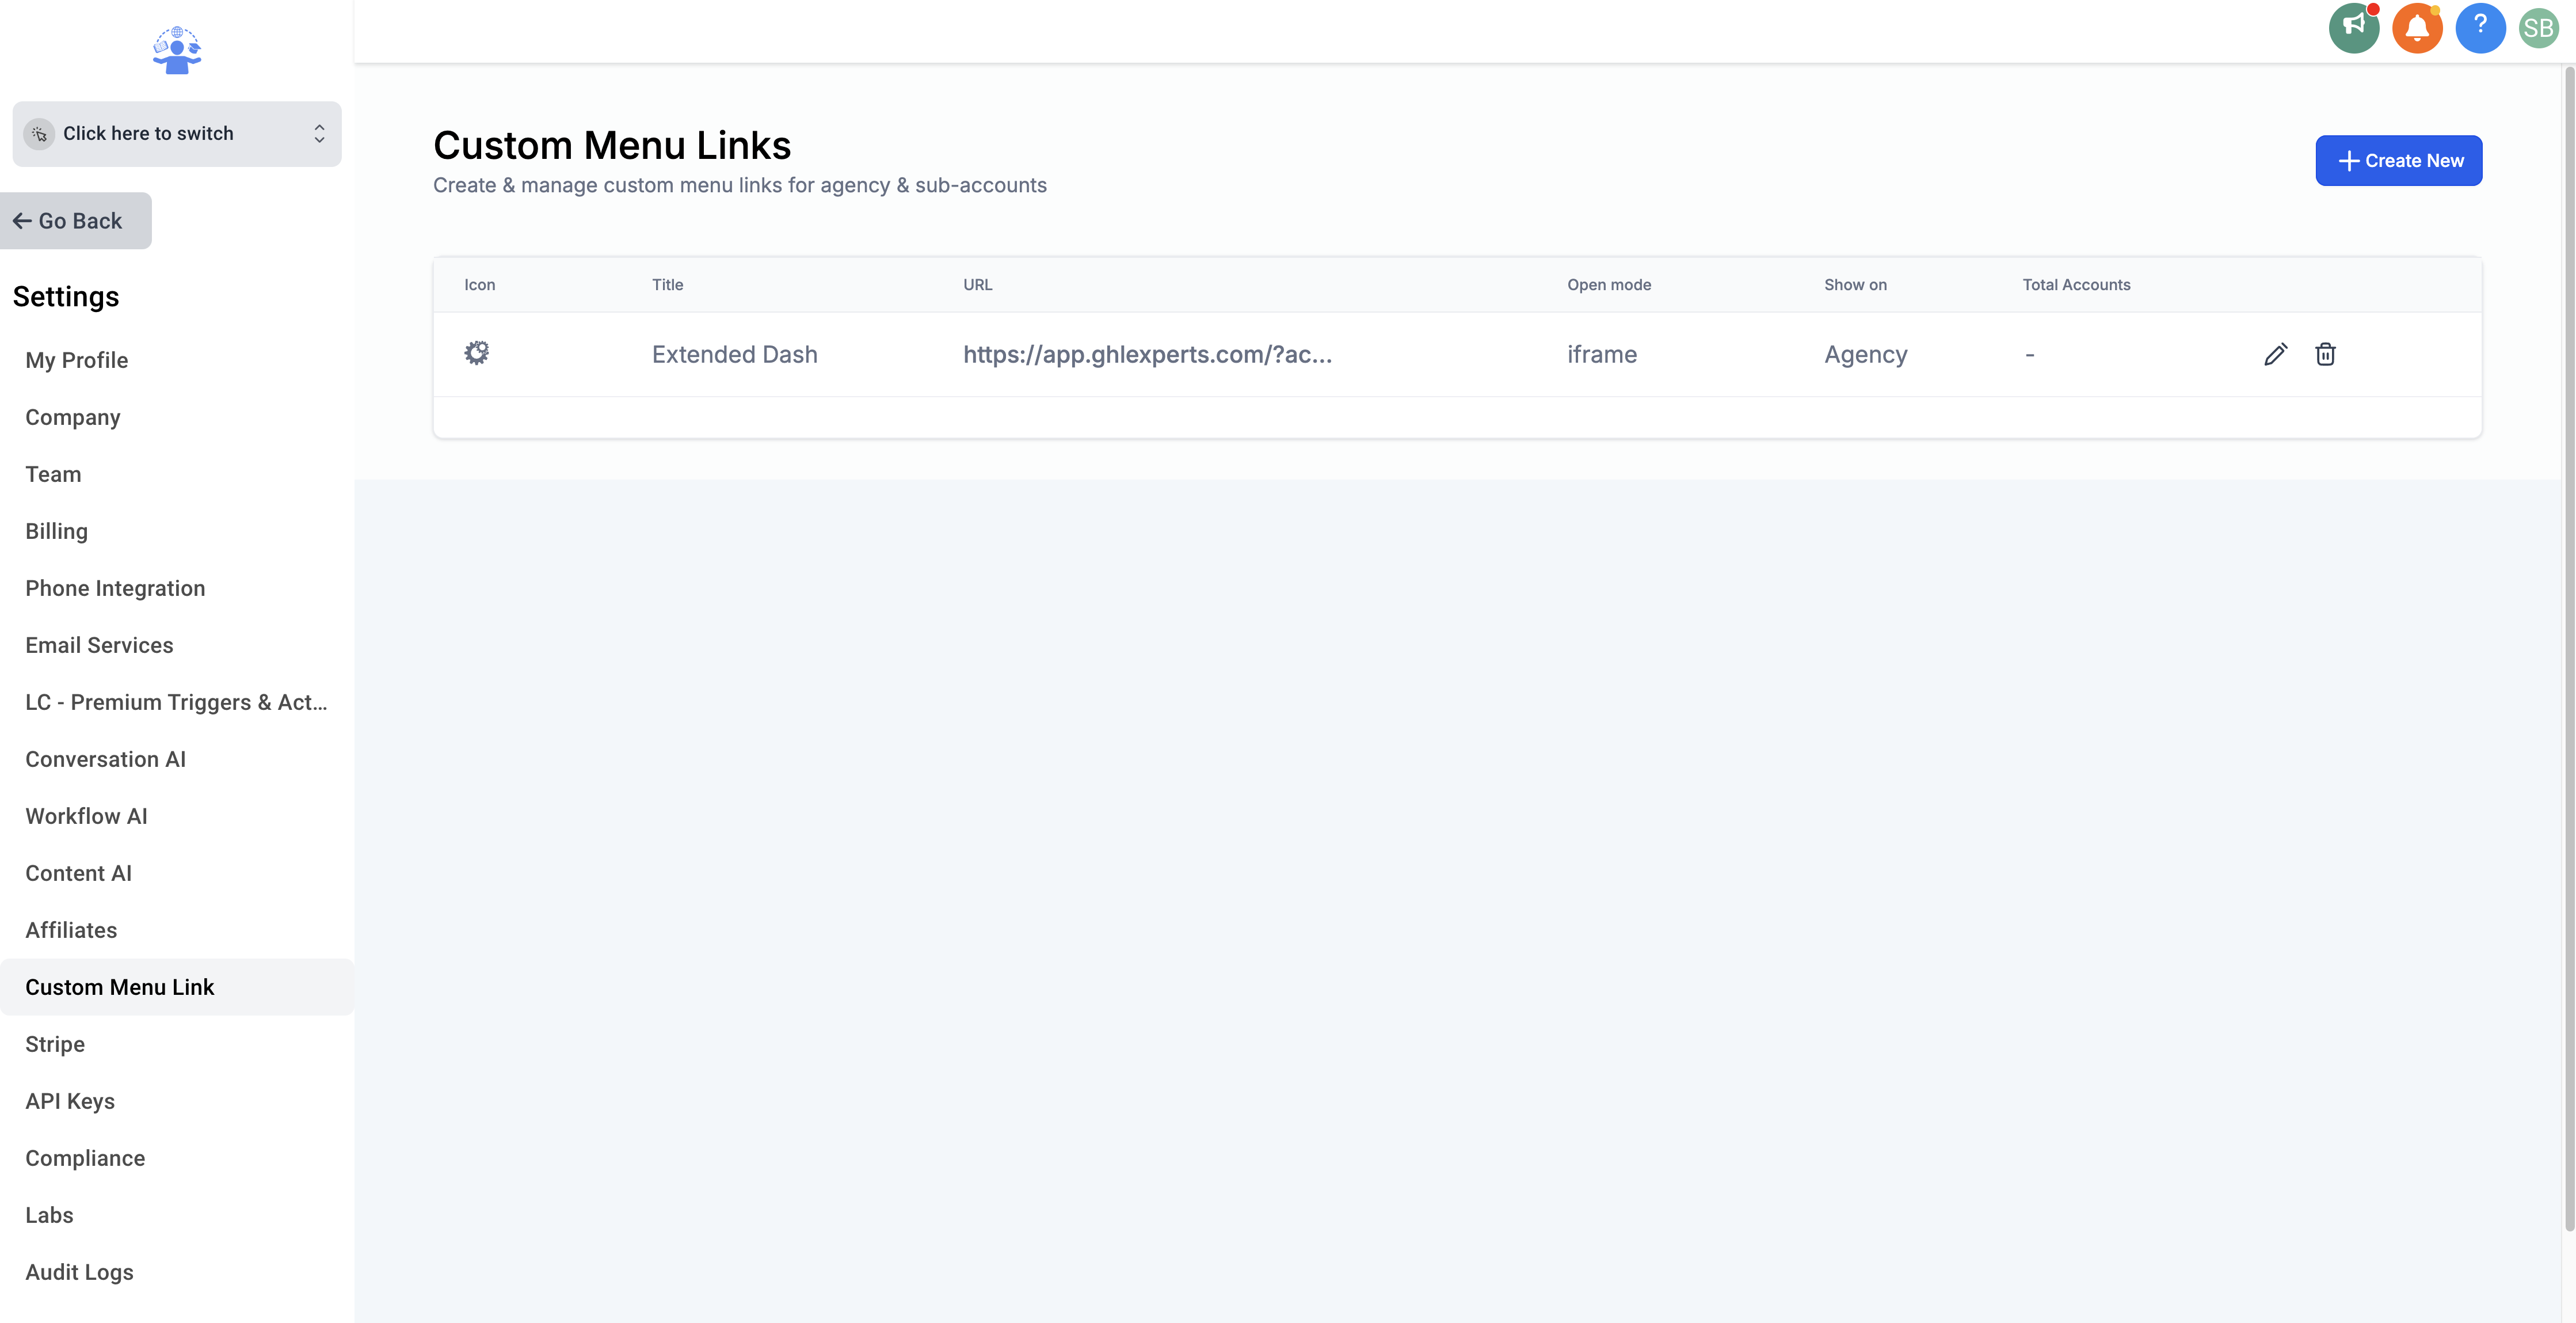
Finally, you can create a custom menu link to streamline user access to Onboarding Forms. Here's how:
- Open the Onboarding Form screen, click the Onboarding Form Link button, and copy the generated Onboarding Form Link.
- Next, navigate to Agency Settings, open the Custom Menu Link Tab, and paste the link to create a custom menu item for quick access.
- This feature simplifies navigation and ensures users can easily access Onboarding Forms whenever needed.

In summary, the Onboarding feature and Sub-Account Management offer powerful tools for streamlining user onboarding and managing access permissions effectively within your platform.