
Posting to Pinterest has never been simpler than now. Thanks to the help of your Social Planner you can organize your content and boost your brand's presence. You can create posts from scratch or upload ones that you have already created to be posted for you by utilizing this awesome tool.
For New Posts
To create a post from scratch start by clicking “New Post” in the top right corner. Select “Create New Post”, alternatively, there's also a "Create New Post" link at the bottom of your posts list.

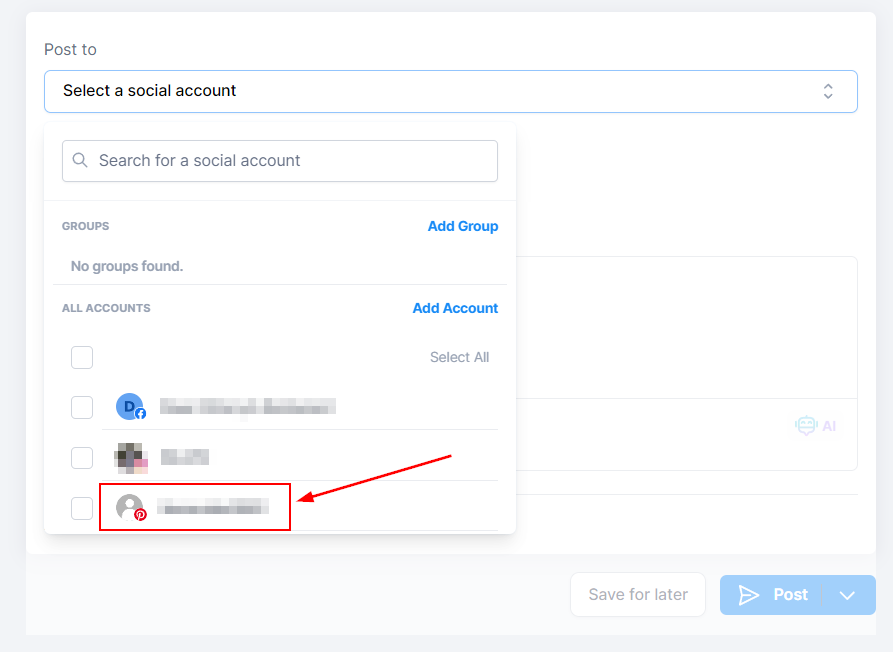
Select Pinterest as the Social Media you want to post on.
Type in your caption and hashtags, or click the robot icon to use the AI tool to aid you in the content creation. Get creative with adding formatting elements like bolded and italicized text.

Pinterest requires 1 image or 1 video to create a pin. To add your media click on either the picture frame or video camera. Once clicked you can generate it using AI or add it from your media library.

For pins, you can add a title, as long as it's under 100 characters, or add links to your post. You will be prompted to select the Pinterest board.

If you don't have any boards, you can create one using the "Add Board" option in the board selection dropdown. If you want to post it to a public board make sure it doesn't have the lock icon.

You can preview all your content here before you post it.

Once you are happy with your post click on the Post button, it will give you the options for the next step with the post. These will be:

After selecting the next step you're done! Your Pin is ready to go.
For CSV File Posts
If you have several posts planned ahead of time you can create them as a CSV file and upload them at once. By uploading your posts this way you can schedule up to 90 posts per CSV.
To start click on the "New Post" button and select the "Upload from CSV" option to direct you to the upload page.

Please keep in mind that your CSV should be properly formatted, you can click “Download a sample file” to get a template of how to format your file.
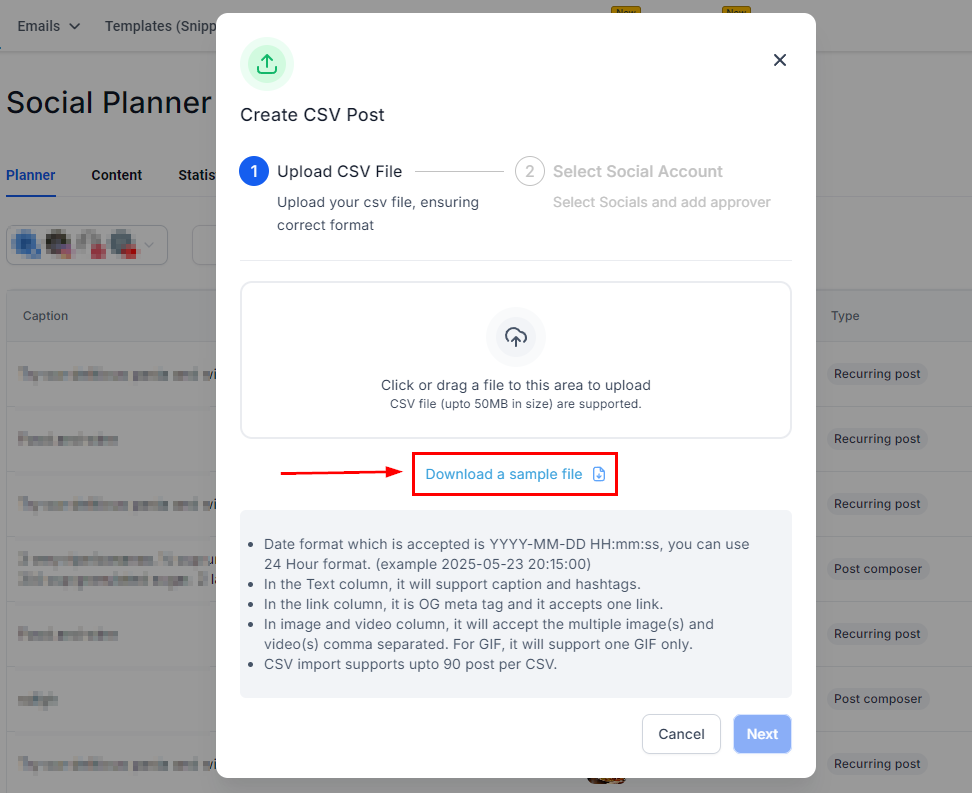
The file needs to:
- The date format accepted is YYYY-MM-DD HH:mm: ss; You can use the 24-hour format. (example 2025/05/23 20:15)
- The Text column will support captions and hashtags.
- In the link column, it is an OG meta tag, and it accepts one link.
- The image and video column will accept multiple image(s) and video(s) comma-separated. For GIF, it will support one GIF only.
Then click Next to select the socials to select the pages you want to post to. As well as selecting the Approver if needed.
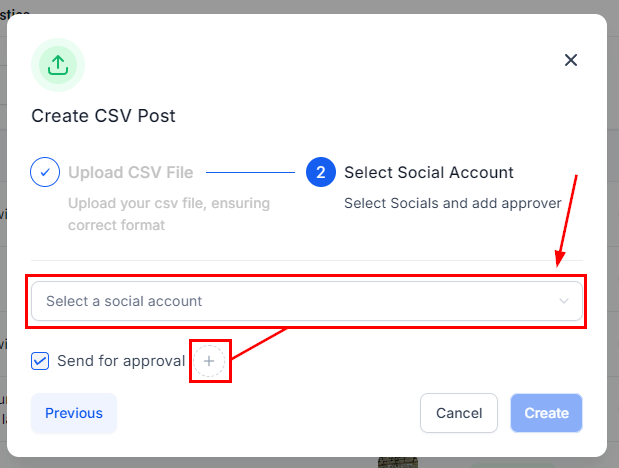
After the posts are imported by clicking on Process CSV, they need to be reviewed by the chosen approver. Once approved, they are scheduled on the social calendar. If no approver is selected they will be scheduled directly.

That's all there is to it. Now you are ready to use your Social Planner to post the best Pins ever! Enjoy using this awesome tool to boost your Pinterest page to another level.