
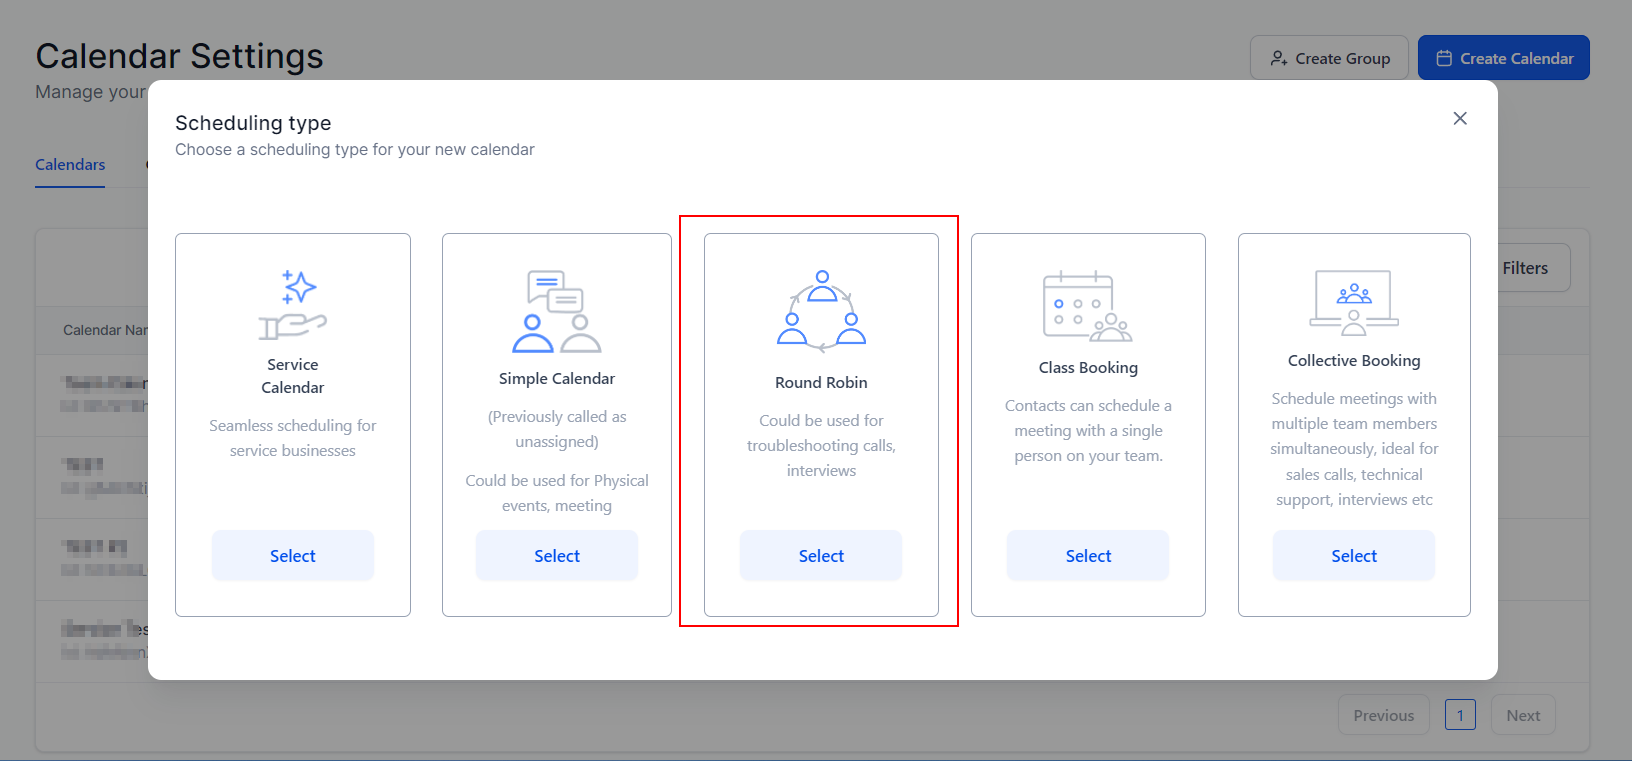
When creating a calendar you have a few types to choose from, one of them will be the Round Robin. This kind of calendar allows you to add as many team members as needed and rotate between them, based on priority or availability, ensuring all team members that take these appointments get booked and available hours don't go unnoticed.
Creating Your Calendar
Once you select this calendar type, you will be directed to the Initial Setup where you'll take the first steps in getting your calendar ready to go, those will be:
- Calendar Name: The name will show why they are scheduling an appointment for leads and customers.
- Adding team members: Select all members who will take this appointment.
- Calendar URL: Type in the calendar slug here.
- Meeting duration: This will define how long the appointment should last.
- Booking availability: These will be the general days and times these appointments can be booked.
- Advanced settings: Once you've set the bases click here to customize your calendar to your company's specifications.

Advanced Settings
Refine the finer details by accessing the advanced settings, there are five categories you can use to maximize the potential of your calendar.
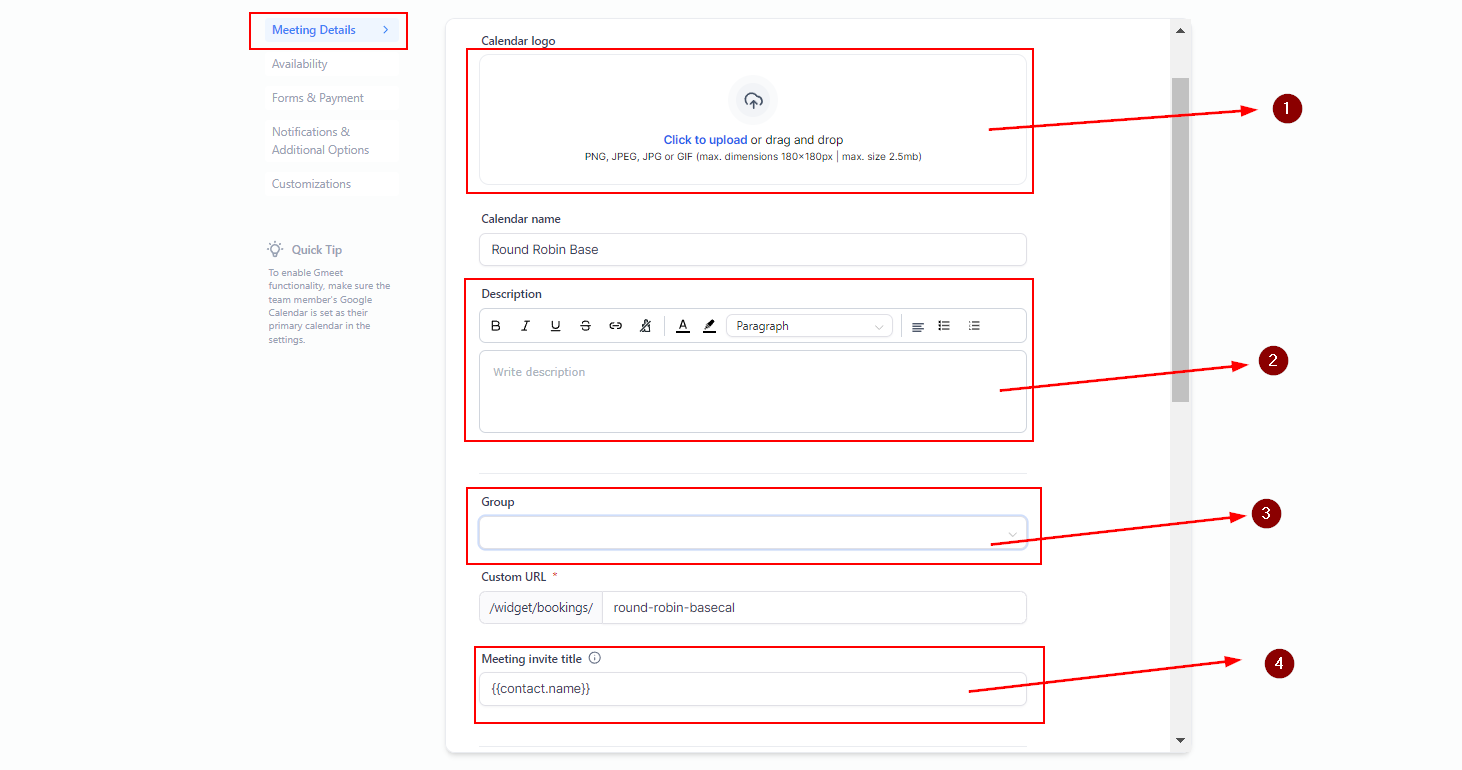
Meeting Details
These are the details that will be visible to your leads and customers, they give a better understanding to both sides of what the appointment will be about. These details will be:
- Calendar logo: Here you can add your company's logo or any other image that helps you represent the appointment.
- Description: Any information you consider relevant about the appointment, including a short explanation of what it is and any extra requirements you have for it.
- Group: If you have a group for related appointments you can select it here
- Meeting invite title: When your leads/customers schedule an appointment, this title will get added to your calendar and the confirmation email.
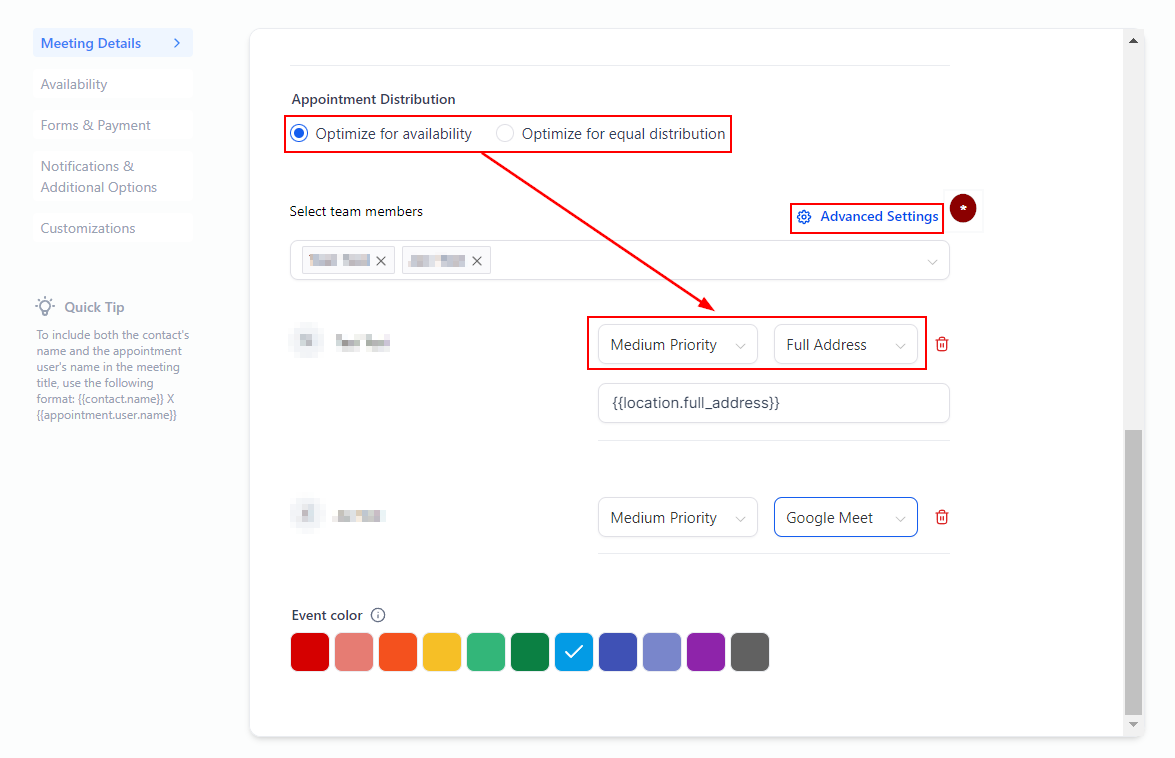
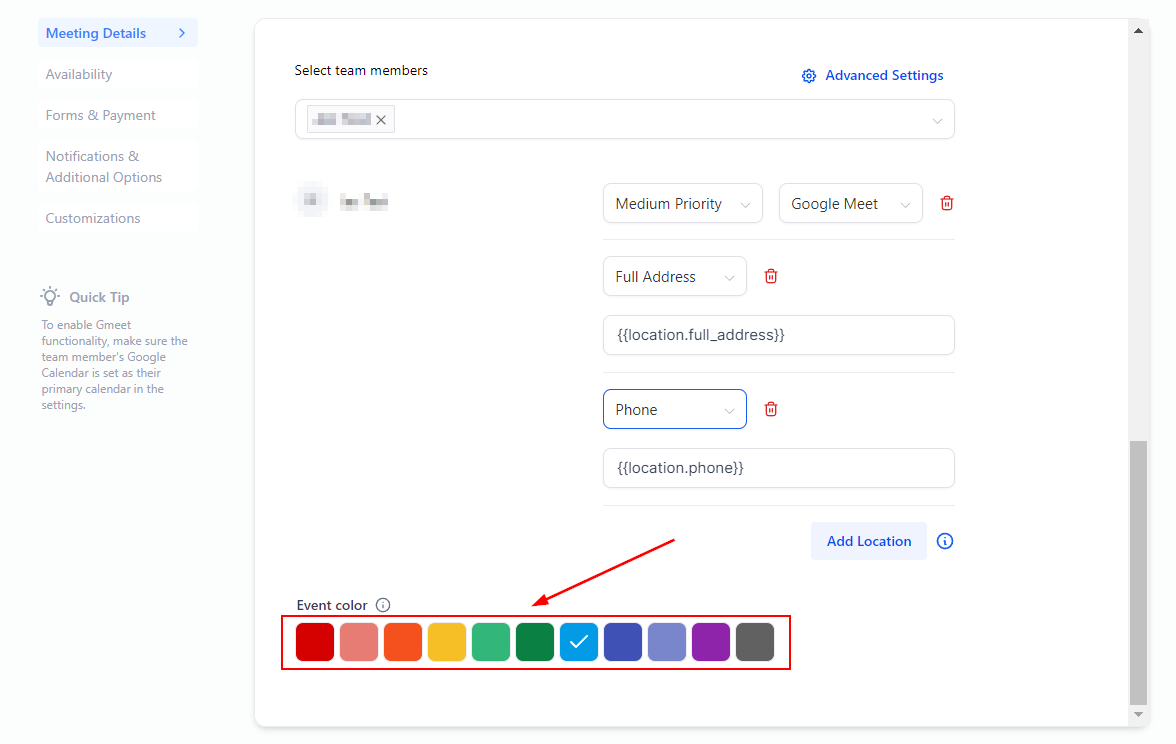
5. Appointment distribution: Define how appointments are assigned to the teammates, optimizing for availability will assign the appointment to whoever is free at the selected time, if two or more users are available it will assign it to the highest priority one or at random if they have the same priority level. Optimizing for equal distribution will assign the appointment to each user at random.
For custom locations, you have the option to add a display label for custom meeting locations within the multiple meeting location feature. This allows you to input a placeholder name, such as "New York Office," which will be shown on the booking widget until the booking is confirmed. Once the booking is completed, the actual meeting location will be disclosed to the booker.

📌 Note: When only one team member is added to the Round-Robin calendar you can add multiple locations for the appointment.
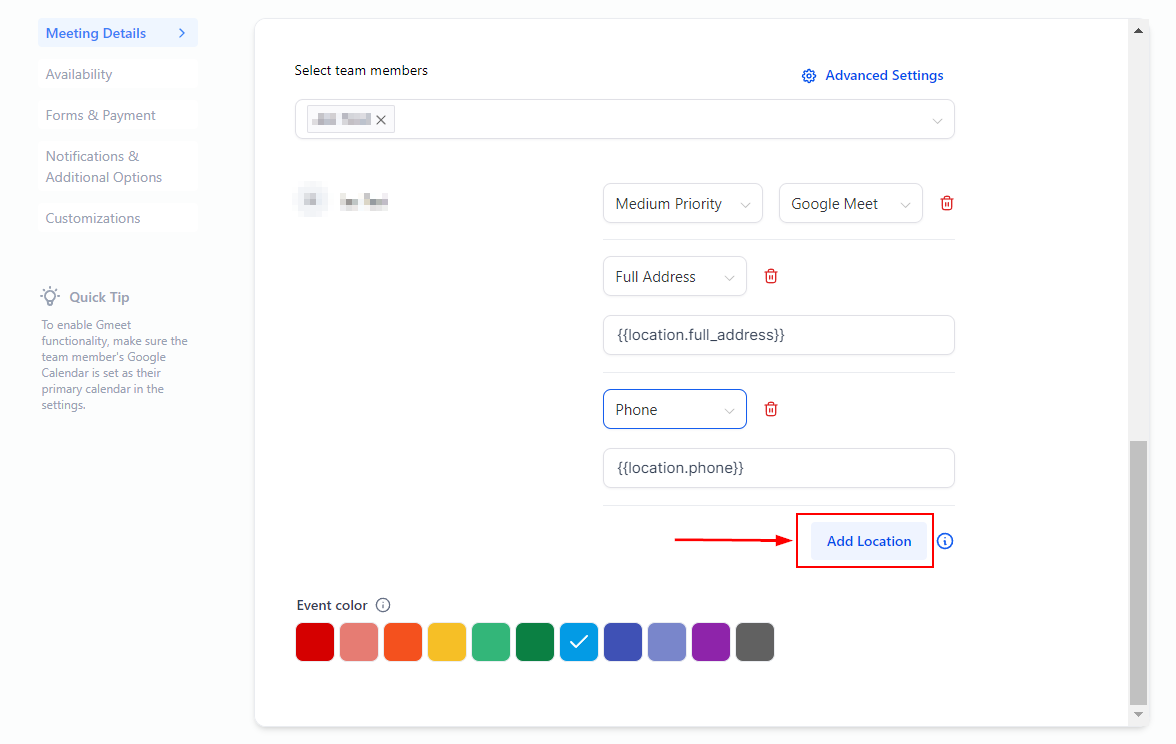
Furthermore, you can allow the booker to input their preferred meeting location when one team member is selected.

(*) Appointment distribution advanced settings: The advanced settings consist of rescheduling and new appointment preferences allowing you more control over which user gets the appointment. In Reschedule Preference you can leave the rescheduled appointment user random or keep it under the same one every time. With New Appointment Preference you can auto-assign the appointment to the contact's assigned user keeping the experience consistent.

📌Note: Turn off ‘Allow Staff Selection’ to prevent bookers from changing the staff member on the booking widget.
7. Event Color: This is the color the appointment will have on your calendar.
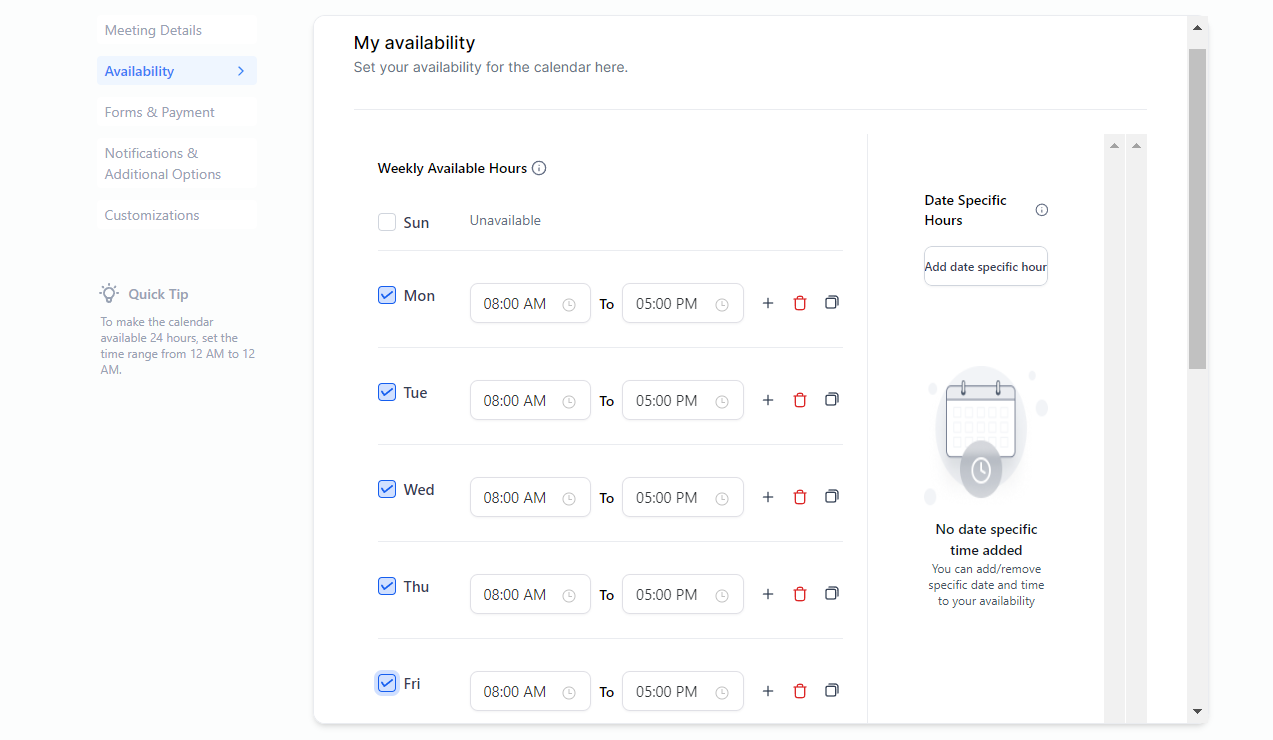
Availability
This is the time management section of your calendar, things like the general days and times you take appointments are managed here. If you have recurring meetings set the way the repetitive scheduling will work or change the settings for when the appointment slot should be open for booking.
Recurring Meeting
Toggle this option for meetings that happen more than once. Set the frequency at which this appointment should happen, Times to repeat will be the total amount of this appointment that will be scheduled consecutively. For unavailable slots, you can skip booking unavailable slots, book the appointment in the next available slot, or continue booking.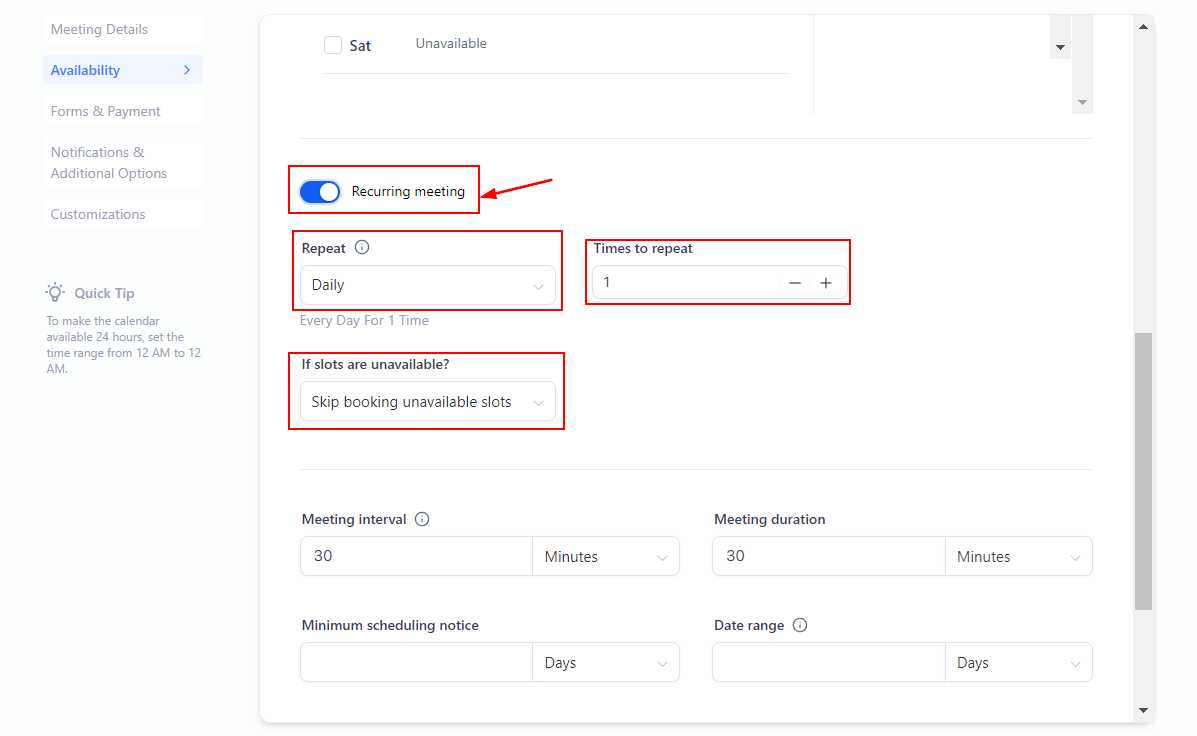
Appointment Slot Settings
Here you will see the availability slot and interval settings. These give you control over the time, length, and quantity of appointments scheduled.
- Meeting Interval: This will be the frequency for available time slots. For example, if you have a 30-minute slot interval, then your time slots will show availability every 30 minutes (10:00 am, 10:30 am, 11:00 am, etc.)
- Minimum Scheduling notice: This defines how soon appointments can be booked in your calendar, this will help you avoid surprise meetings. For example, if you choose 2 days, nobody can select a time slot less than 48 hours away from the time of booking.
- Date range: This defines how far in advance an appointment can be scheduled. For example, if you set this to a month then customers can't select a date two months away from the time of booking.
- Maximum bookings: These two help you define (1) the total amount of this type of appointment your team will have on a day and (2) the number of slots that the calendar should keep open per user (If the number of appointments exceeds the given slot for the user, then it either switches over to the next user in the round-robin queue or marks the slot unavailable for the prospect to book).
- Pre and Post Buffer: To give you or your team a break between appointments, you can establish a buffer before or after the appointments. This helps prevent back-to-back appointments.

Forms & Payment
To change the way you collect information about the contact booking the appointment or collect deposits/fees related to the booking use one of the following sections:
- Select forms: Here you can switch the form this calendar uses to book the appointment.
- Widget order: This will set the order in which the contacts fill out the form and book their appointment.
- Pre-populate forms: Also known as sticky contact, this will grab the information of any forms previously filled in that IP address.
- Consent checkbox: This option allows you to obtain consent from contacts to reach back when they provide their phone number during the appointment booking process.
- Add guests: With this on the person who booked the appointment is free to send invitations to multiple attendees so they can join the meeting.
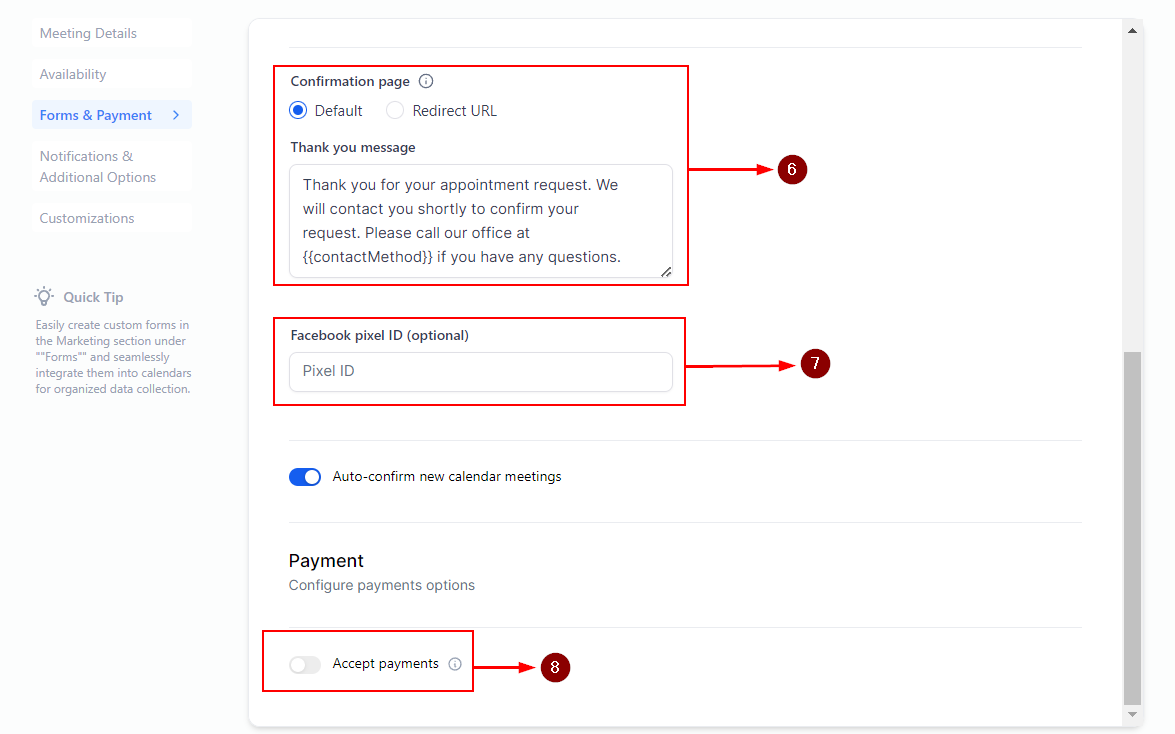
- Confirmation page: This will show after someone makes a booking, if you use Default you can set a custom message on the same page, or by selecting Redirect URL you can send the contact to a website of your choice.
- Facebook pixel ID: To track new appointment bookings with your Facebook Ads Manager add your Facebook Pixel here.
- Payment: By enabling this option, you can take payment for the appointment at the moment of booking. To learn more about this section in particular please refer to the article “Add Payments to Appointments”
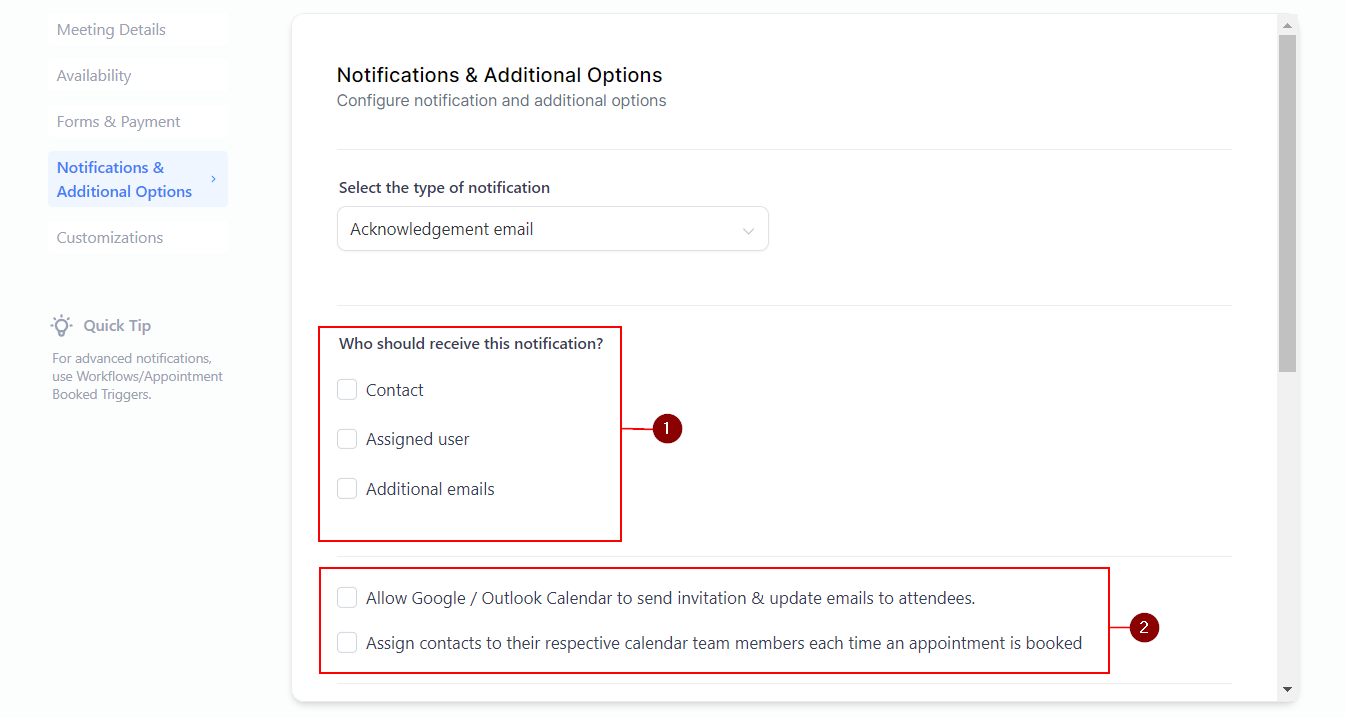
Notification & Additional Options
- Notification: Once an appointment is booked the system will send a confirmation email to all selected parties.
- Additional options: By enabling option one an email will be sent out if you make any changes to the appointment directly inside the Google/Outlook calendar. By enabling the second option when an appointment is booked the team member will be selected as the contact's assigned user from that point onwards.
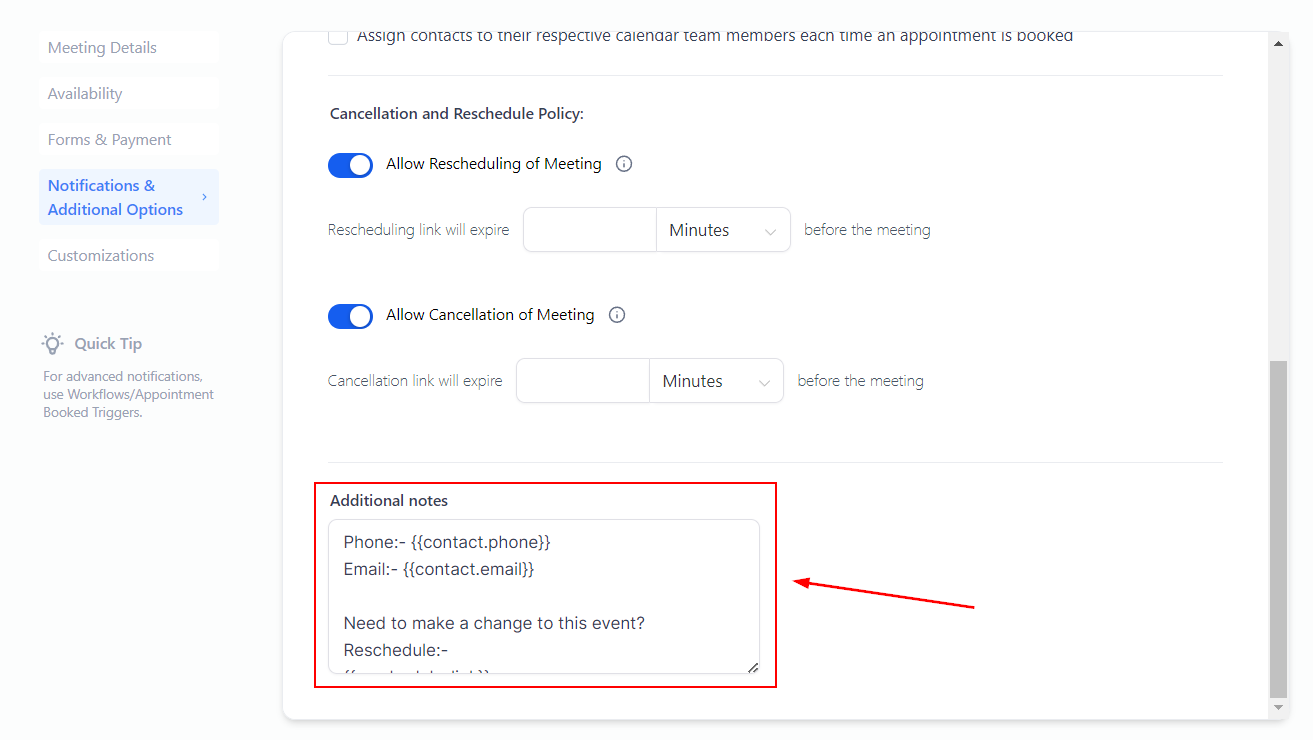
Cancellation and Reschedule Policy: If the option is toggled on the system automatically adds a link for the contacts to handle the rescheduling or cancelation, this link can be removed by toggling the button off. Additionally, you can give this link an expiration window limiting how soon it can be used before the appointment.

Additional notes: This allows you to modify the additional notes for the appointment.
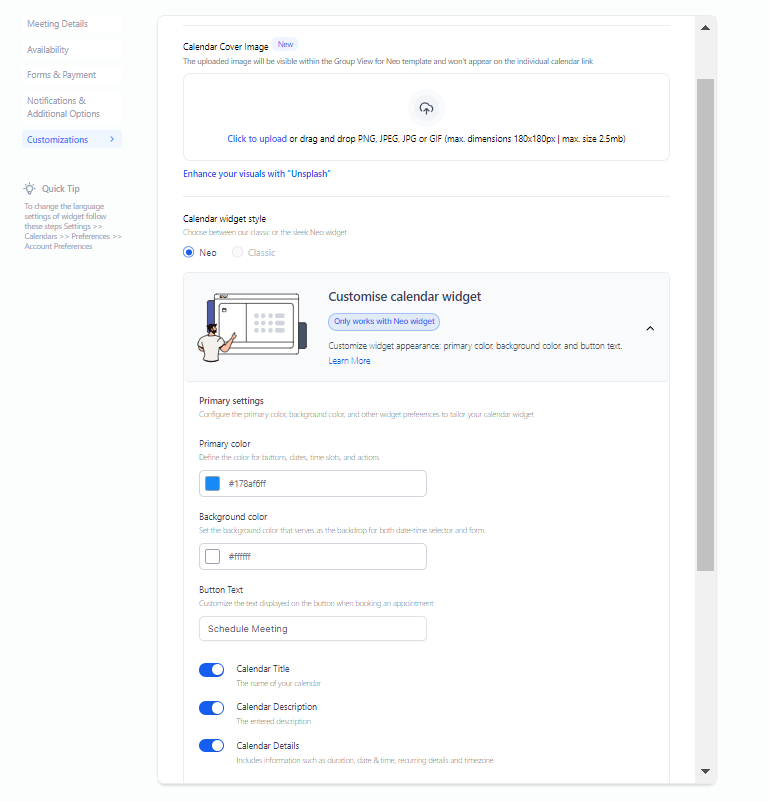
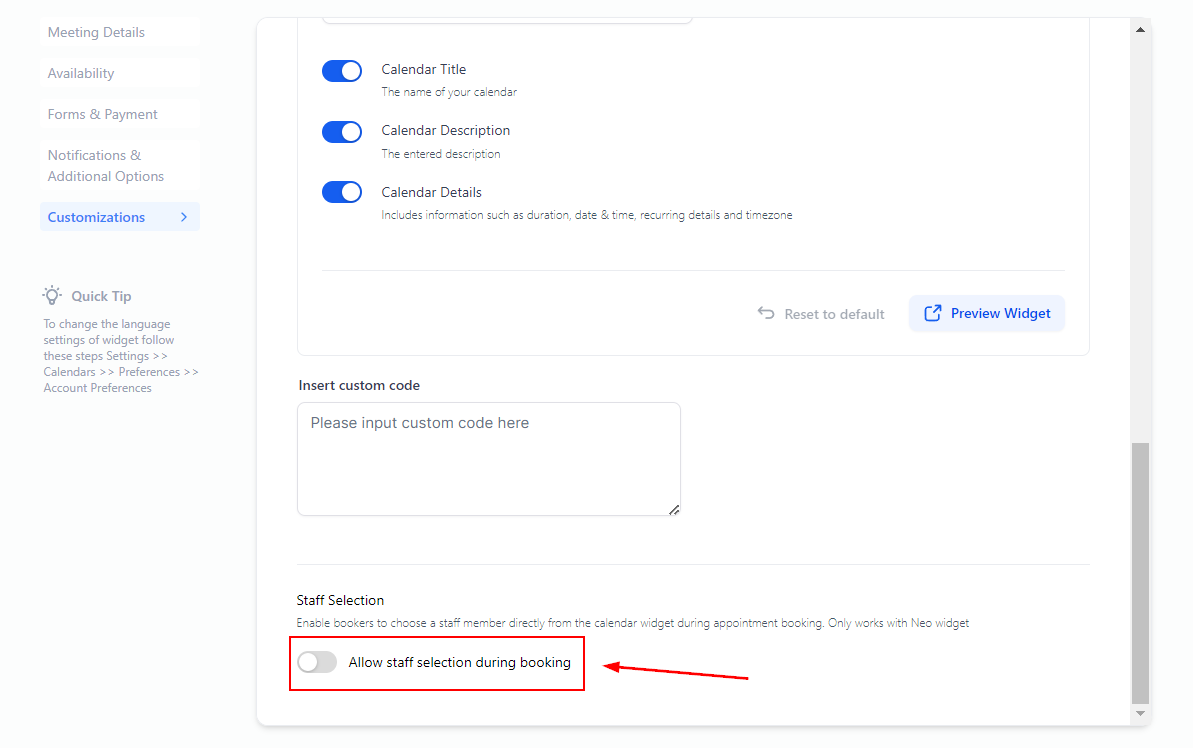
Customization
Personalize your calendar to the max here, you can add a cover image, change the style and colors of the calendar, the text of the button, and the information shown on the calendar.
Custom Code: If you have software developers on staff, or you know how to write custom code, you can add it in this field. This is an advanced step so we recommend avoiding it if you're unfamiliar with coding.
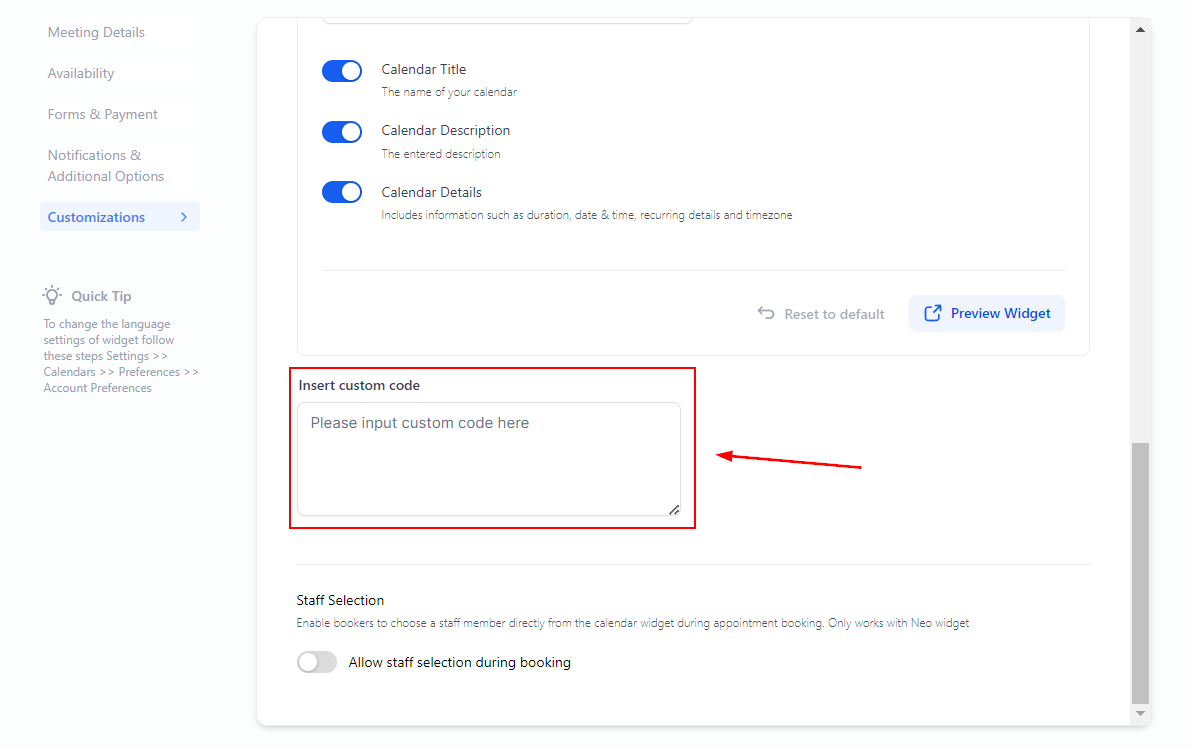
Staff selection: Toggle this option on to give your customers control over who they have the appointment with, if you keep it off the appointment will be assigned according to the usual rules for the calendar.
The round-robin calendar will be a great ally to your team's cooperation and organization and will help you ensure you're making the most out of everyone's available time. And, following these steps will ensure you can make the most of your round-robin calendar. We hope you enjoy it and get fully booked!