
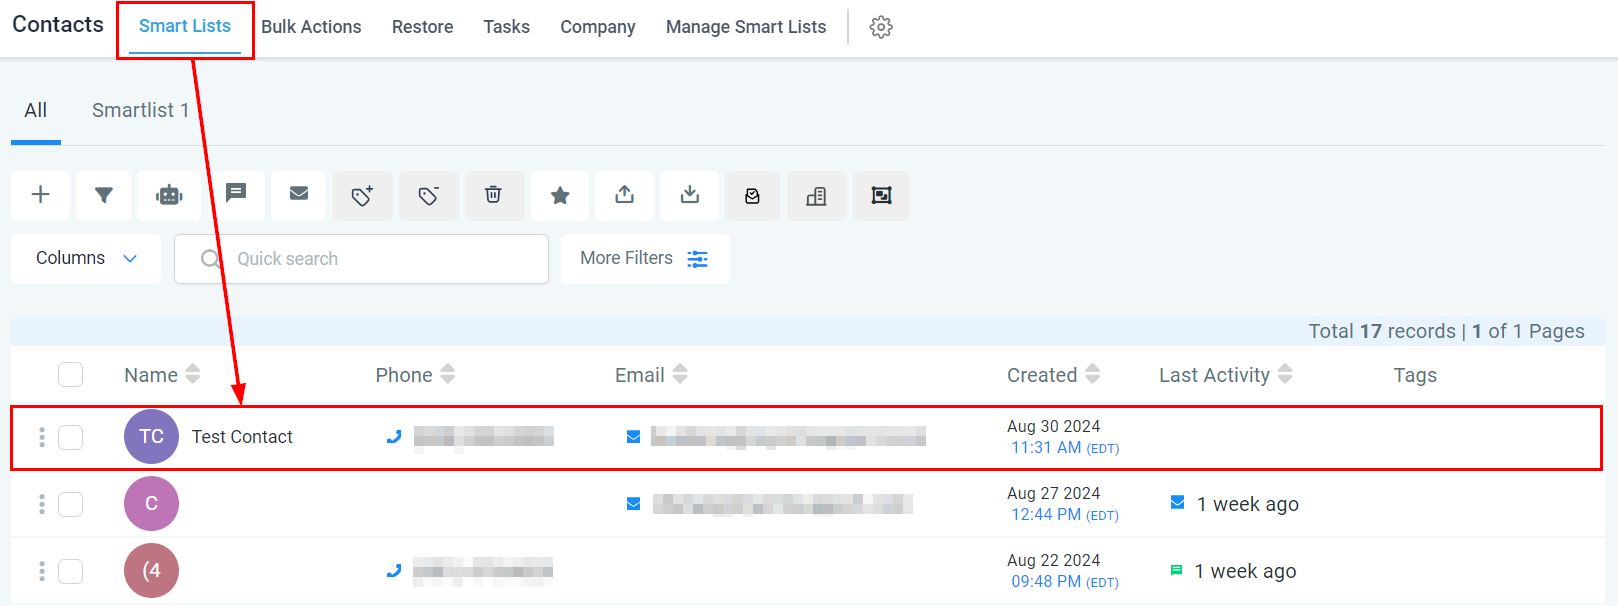
In the Messages panel, you can review the message and conversation history with a specific contact. This section displays all messages and calls associated with that contact, offering a comprehensive record of all interactions and facilitating effective client and customer communication management. Select a contact within the Contacts > Smart Lists section to begin.
Messaging Header
The message header includes a range of options and buttons that allow you to customize and tailor your communication. These tools ensure that your messages are presented according to your specific needs and preferences, ultimately enhancing the effectiveness of your communication efforts.

Assign Contact
To assign a contact to a team member, use the "Assign Contact" button. This feature enables you to allocate the contact to a registered user, aiding in better work management and streamlining team communication.

Assign Followers
This feature allows you to add up to 10 users as followers, granting them the ability to view and edit the contact record when the "Only Assigned Data" user permission is enabled.

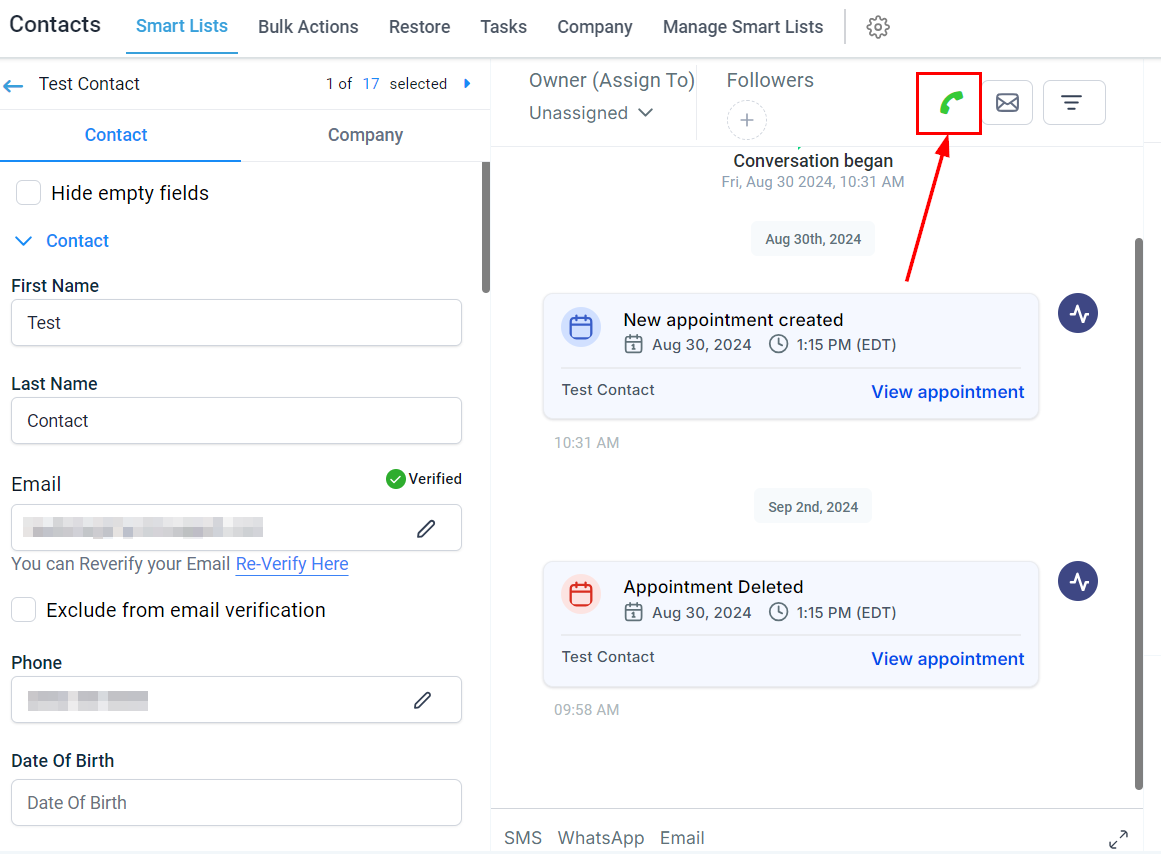
Call Contact
Clicking the phone icon will initiate an automatic call to the contact you are currently viewing. This feature streamlines the calling process by eliminating the need for manual phone number entry, thereby facilitating more efficient and seamless communication.
Mark Messages As 'Read/Unread'
Messages can be marked as either read or unread by selecting the corresponding button in the message header. This function helps keep your message management organized, ensuring that no tasks or priorities are overlooked.

Filtering Messages
View messages sent in a specific channel or group contact activity by applying filters within the contact record. This allows you to efficiently track communication history, streamline follow-up actions, and ensure a comprehensive overview of all interactions within that context.

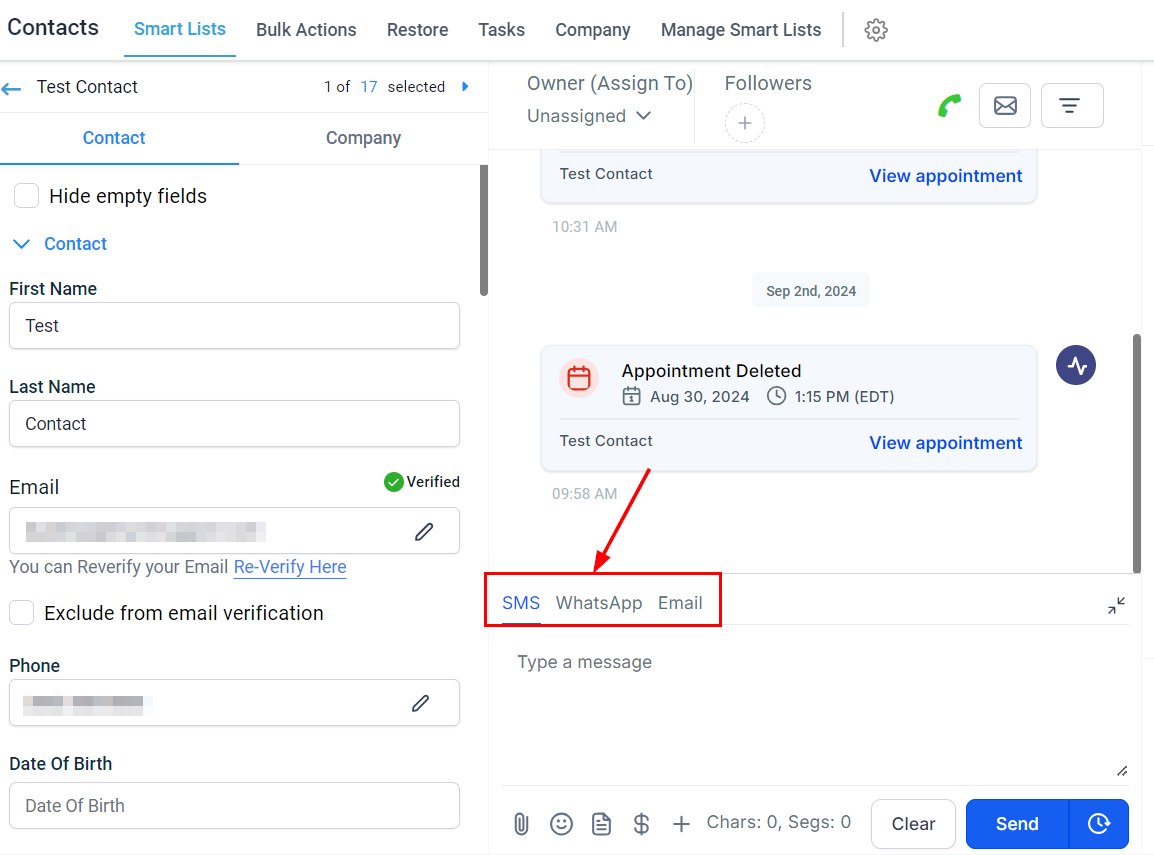
Sending Messages
To send a message, first select the message channel.
Next, compose your text within the designated field. You can enhance personalization by utilizing templates, adding emojis, attaching files, or incorporating custom values.

This feature provides an efficient method for responding to any inquiries or concerns your contacts may have.